Role Management
![]() Copied
Copied
Time Champ Role management helps you manage authorization, which enables you to specify the resources that users in your application are allowed to access. Role management lets you treat groups of users as a unit by assigning users to roles such as manager.
The primary purpose of establishing roles is to give you an easy way to manage access rules for groups of users. You create users and then assign the users to roles.
Time Champs supports three levels of Hierarchy for an organization namely classified as Super Admin, Manager, and Employee. Super Admin has access to view the entire company, whereas the remaining have access to their reporting employees.
Navigation: Go to Time Tracker => Hierarchy menu
If the user has Super Admin Permission,
then
he can be able to view the company-level hierarchy.
This permission can be configured by following the steps: -
View Subordinates Users ,
then select the roles for what you must give the permissions to configure and check them.View Subordinates Users
for the defined roles.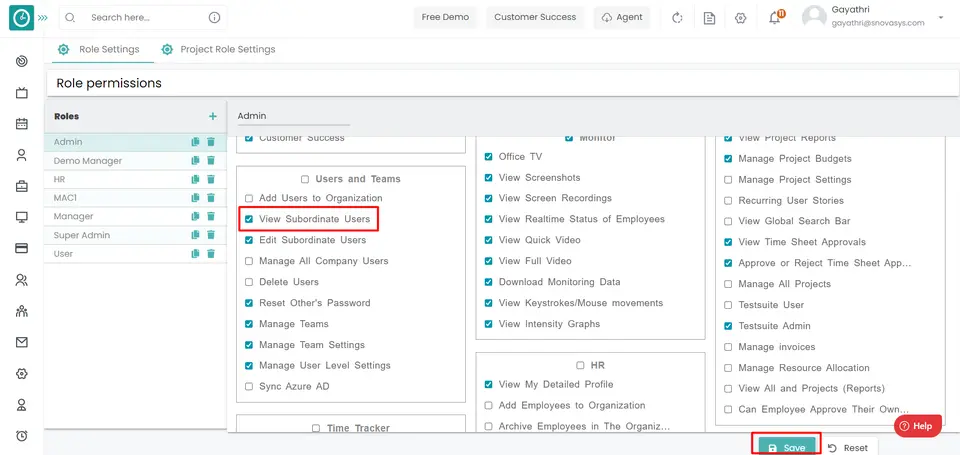
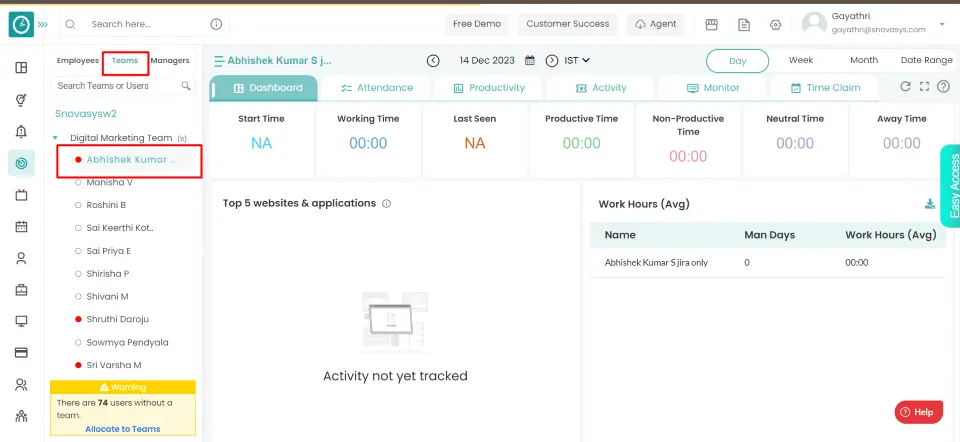
Employee
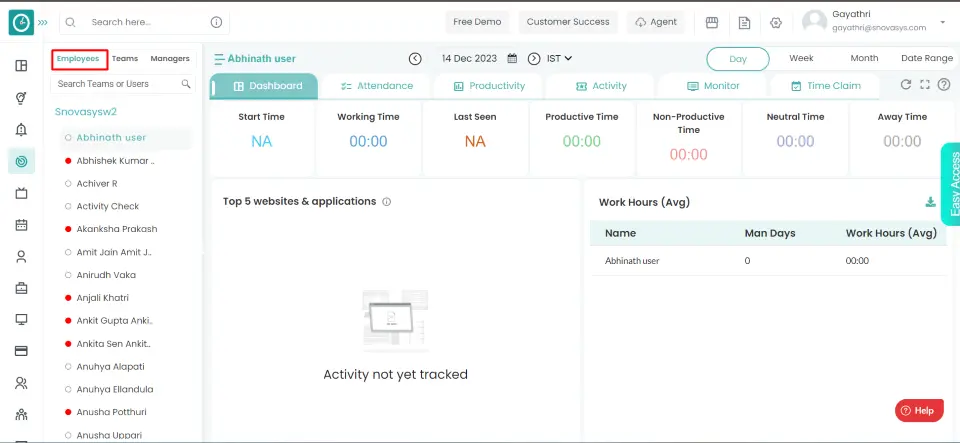

Now you can view specific employee insights in the window [right side].
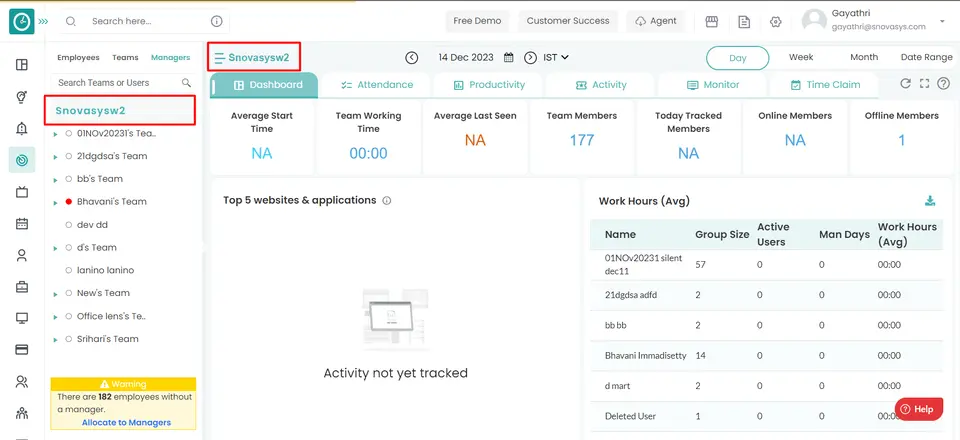
Team
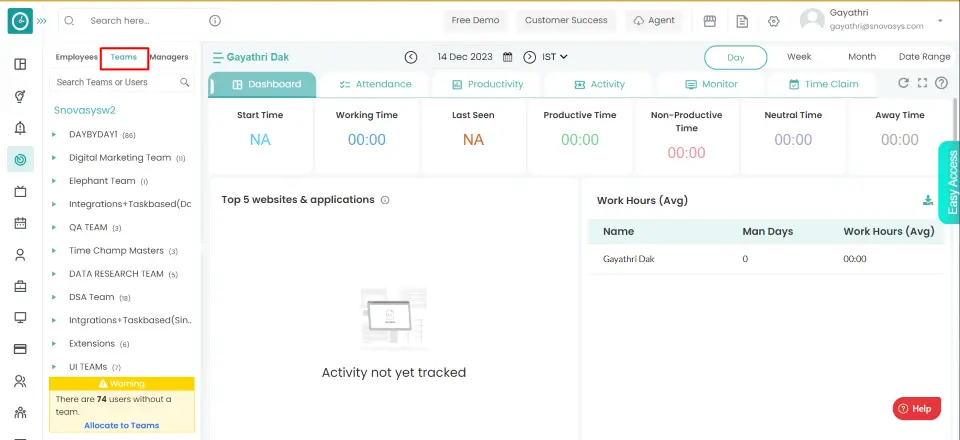
Now you can view specific employee insights in window [right side].
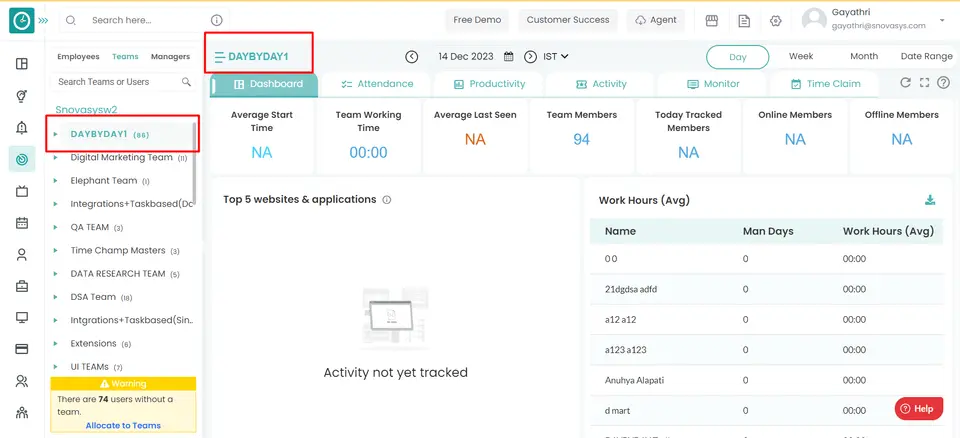
Manager
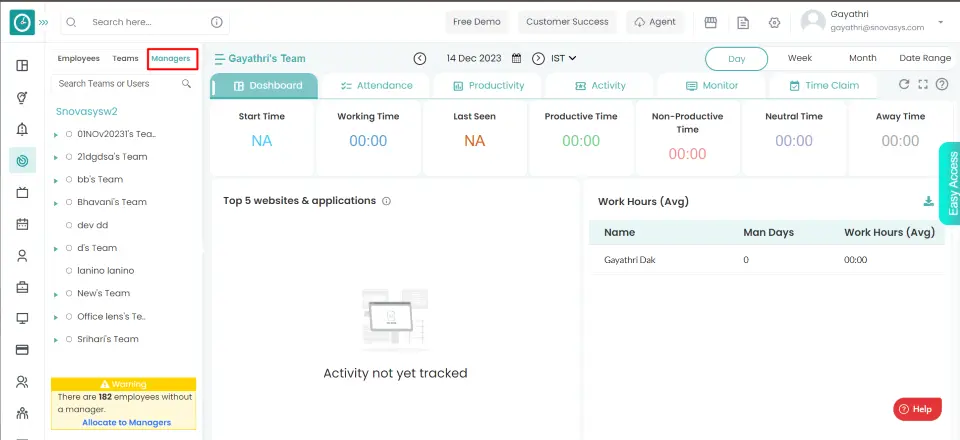
Now you can view specific employee insights in window [right side].
Time Champs allows you to have any role type with the necessary permissions.
Navigation: Goto Settings => Role Settings
If the user has Super Admin Permission,
then
he can be able to configure Role Settings.
This permission can be configured by following the steps: -
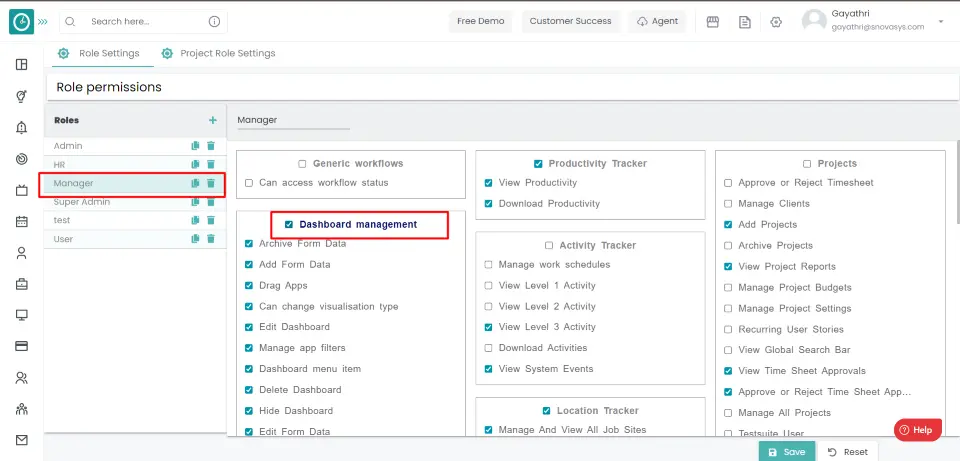
Role Management ,
then select the roles you want to grant permissions to configure and check them.Role Management
for the defined roles.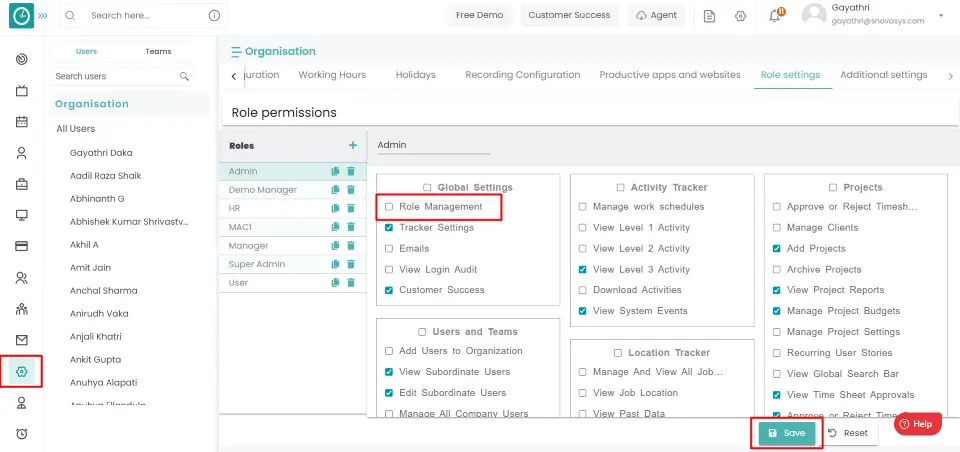
Roles
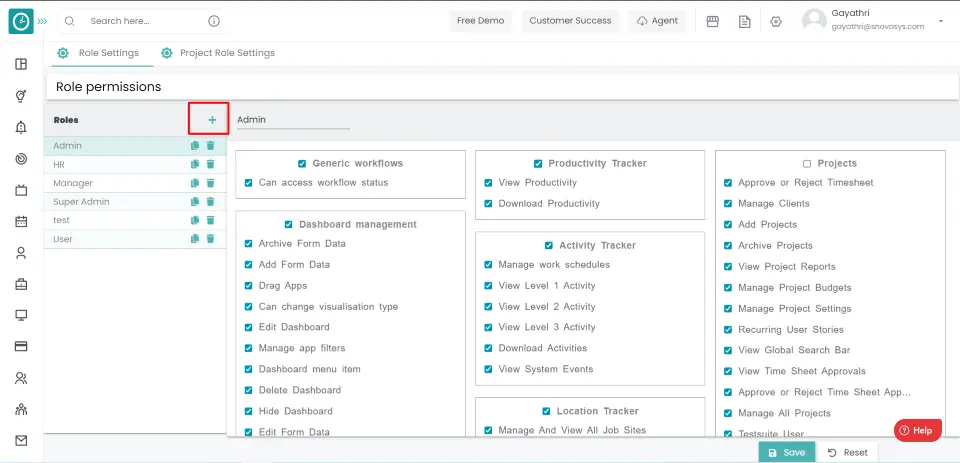
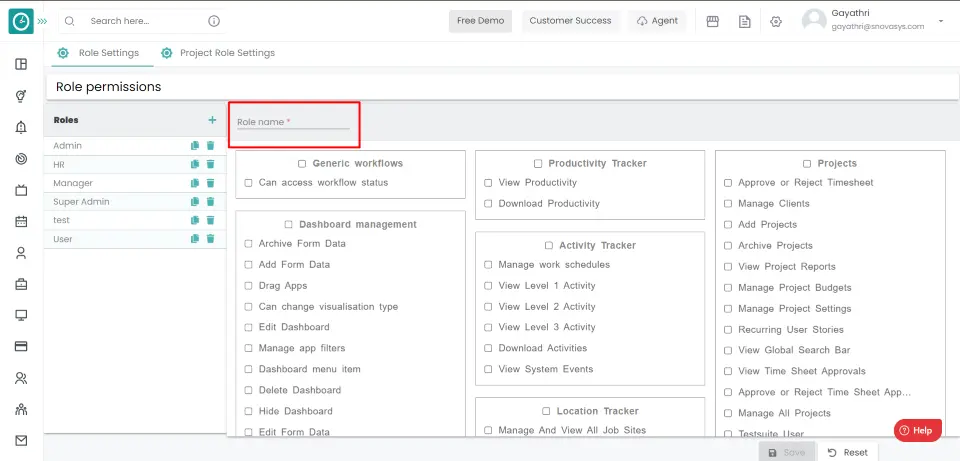
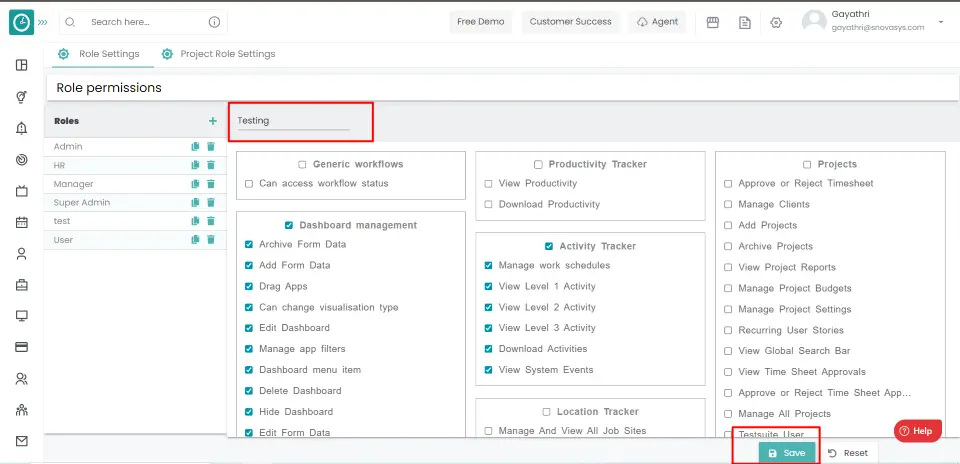
You have now added a new role.
Time Champs allows you to grant users access to various managing features.
Navigation: Go to Settings => Role Settings
If the user has Super Admin Permission,
then
he can be able to configure Role Settings.
This permission can be configured by following the steps: -
Role Management ,
then select the roles you want to grant permissions to configure and check them.Role Management
for the defined roles.Roles
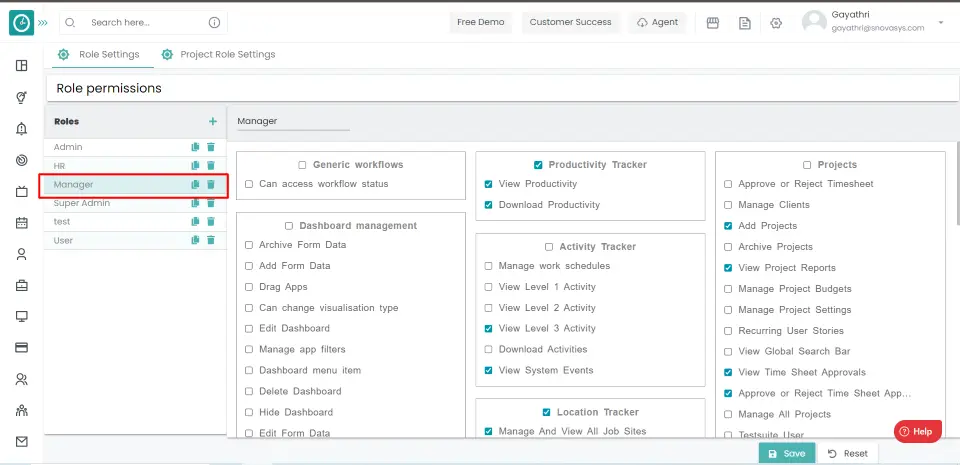
You have now granted permission.
You need to set the defined position to a user by assigning a role, which helps Time Champ manage
Navigation: Go to Users => Edit => User Profile
If the user has Super Admin Permission,
then
he can be able to assign/edit a role.
This permission can be configured by following the steps: -
Edit Subordinate Users / Manage User Level Settings ,
then select the roles you want to grant permissions to configure and check them.Edit Subordinate Users Manage User Level Settings
for the defined roles.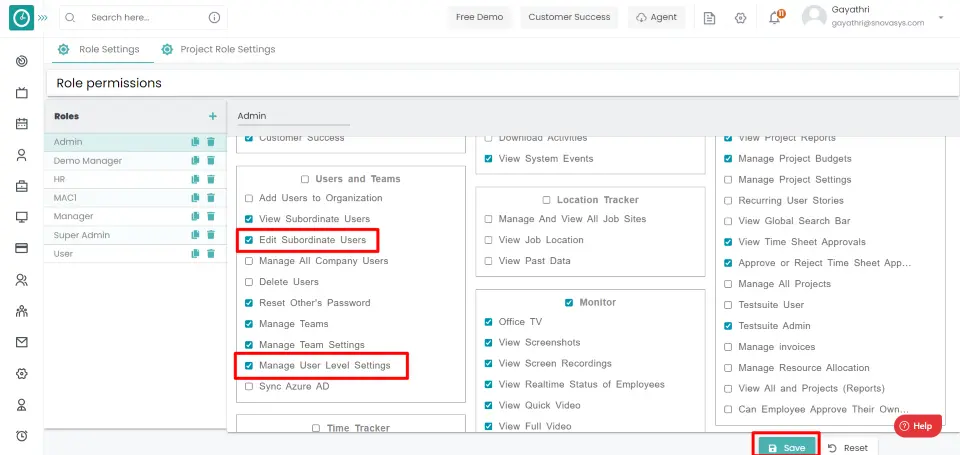
User Profile
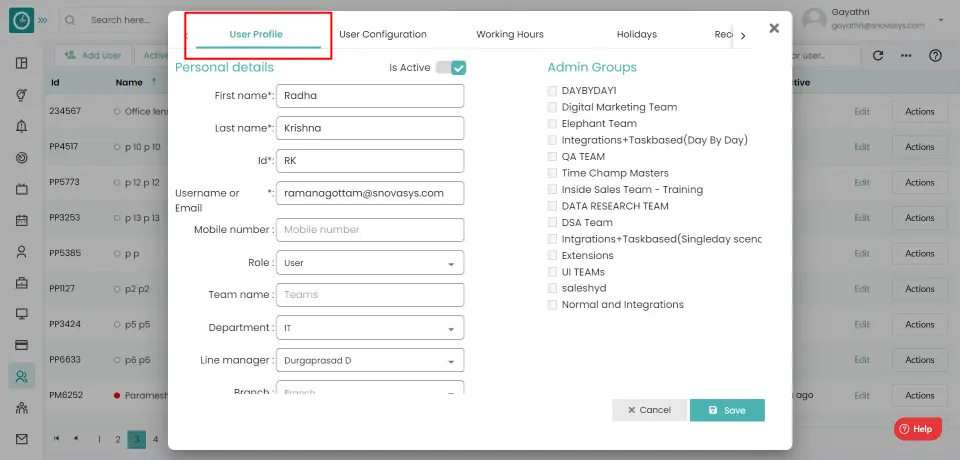
You have now assigned/edited a role.
Time Champ allows you to delete roles that you have created but are no longer using...
Navigation: Go to Settings => Role Settings
If the user has Super Admin Permission,
then
he can be able to delete a role.
This permission can be configured by following the steps: -
Role Management ,
then select the roles you want to grant permissions to configure and check them.Role Management
for the defined roles.
Roles
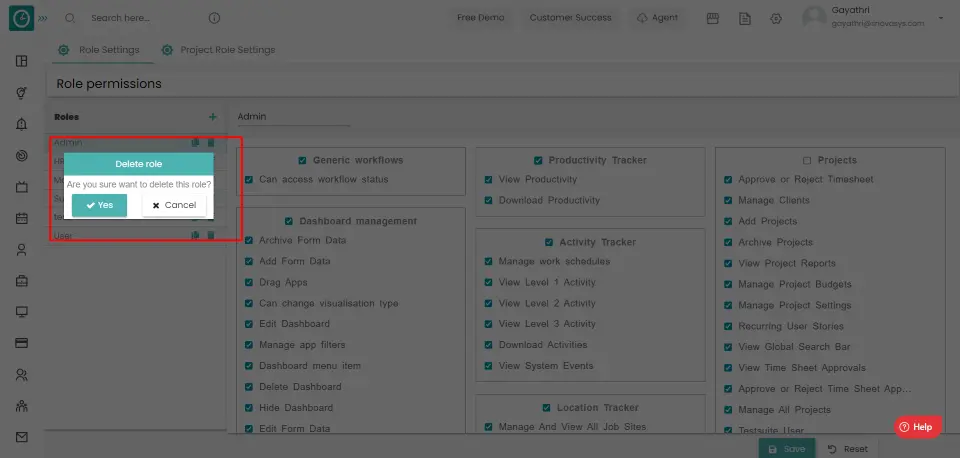
You have now deleted a role.
You can copy a role with the same permissions.
Navigation: Go to Settings => Role Settings
If the user has Super Admin Permission,
then
he can be able to configure Role Settings.
This permission can be configured by following the steps: -
Role Management ,
then select the roles you want to grant permissions to configure and check themRole Management
for the defined roles.
Roles
You have now copied a role.
You can view a list of roles configured for a specific permission.
Navigation: Go to Settings => Role Settings
If the user has Super Admin Permission,
then
he can be able to configure Role Settings.
This permission can be configured by following the steps: -
Role Management ,
then select the roles you want to grant permissions to configure and check them.Role Management
for the defined roles.Permissions
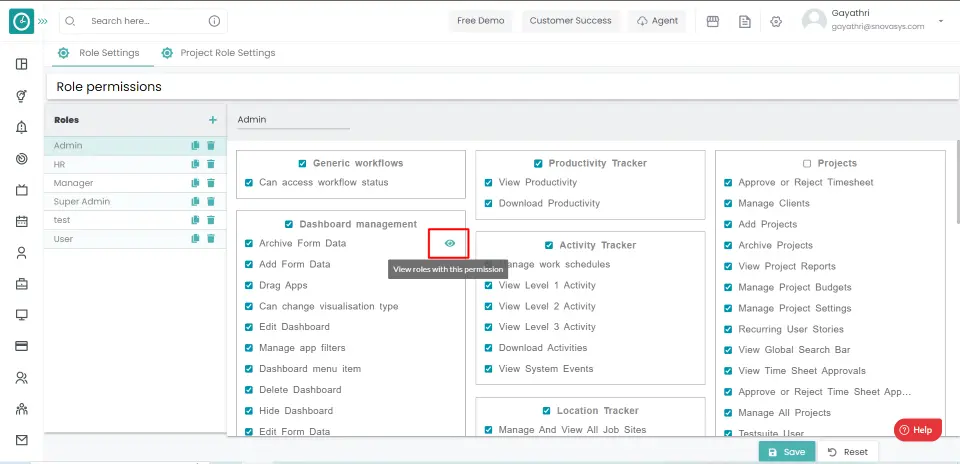
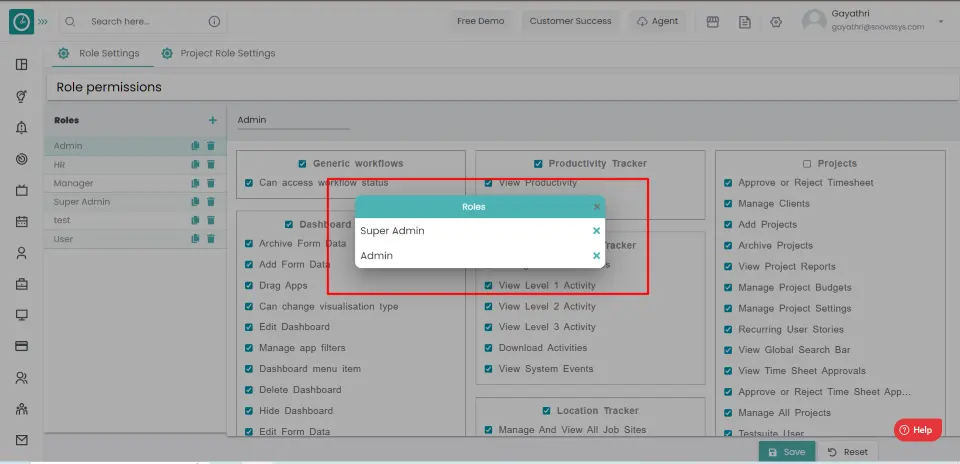
You can view roles configured to a permission.
Employees who are assigned to no one will be displayed as unassigned in Hierarchy.
Navigation: Goto Time Tracker => Hierarchy menu
If the user is having Super Admin
Permission, then he can be able to view company level hierarchy.
This permission can be configured by following the steps: -
View Subordinates Users ,
then select the roles for what you must give the permissions to configure and check them.View Subordinates Users
for the defined roles.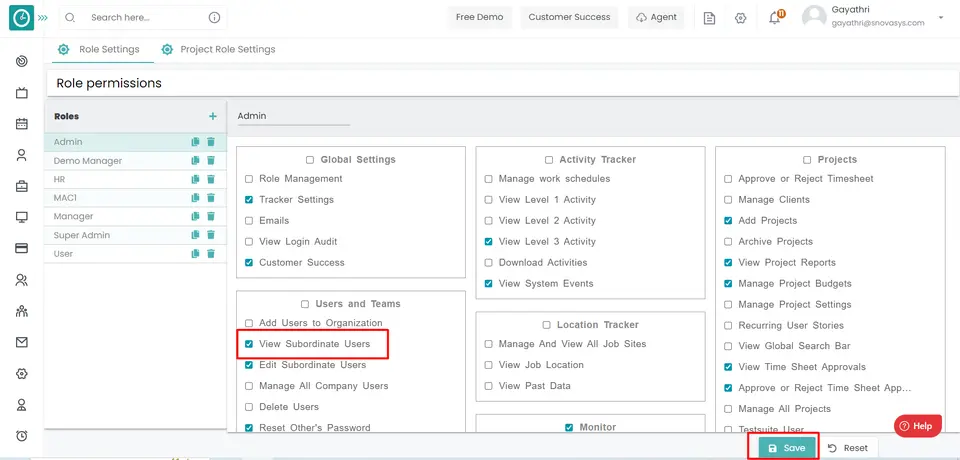
Unassigned employees
You can view unassigned employees in Hierarchy tree in Time Tracker tab.
Users Management
![]() Copied
Copied
Time Champ Users allows you to manage all the users in the company in one place. You can add the user to the company and delete the user from any team. You can add the data of every user in Time Champ. A user is a person who utilizes a computer or network service. A user often has a user account and is identified by a username in the system. Other terms for username include "login name," "screen name," "account name," "nickname," and "handle," which are derived from the same root.
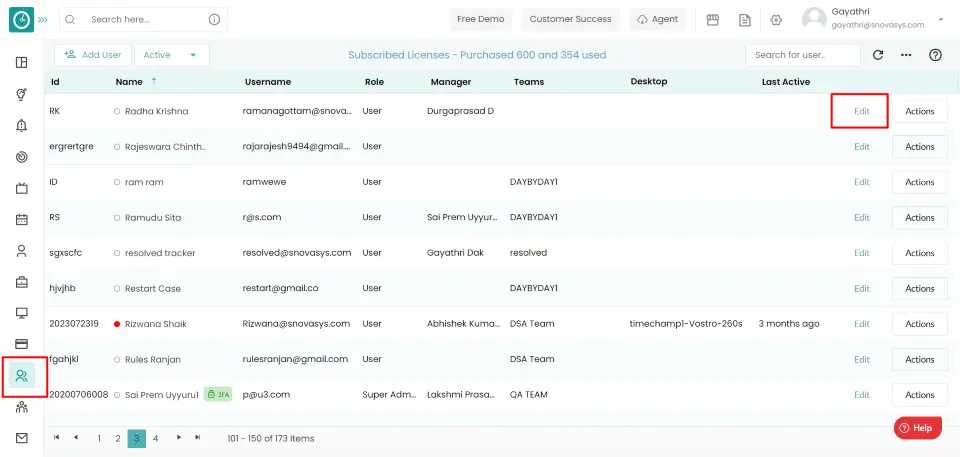
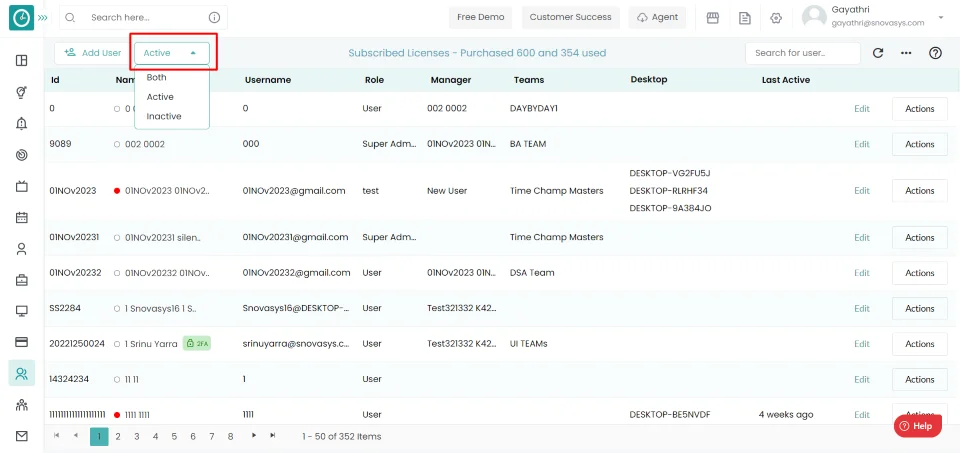
You can see the list of users in the organization.
Navigation: Go to Users => Users Tab
If the user has Super Admin Permission,
then
he can be able to view users.
This permission can be configured by following the steps: -
View Subordinate Users / Manage All Company Users ,
then select the roles you want to grant permissions to configure and check them.View Subordinate Users Manage All Company Users ,
for the defined roles.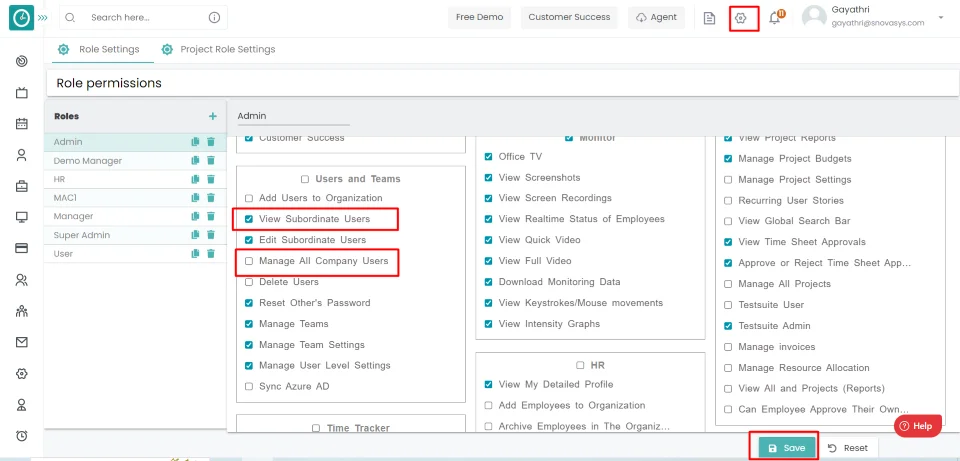
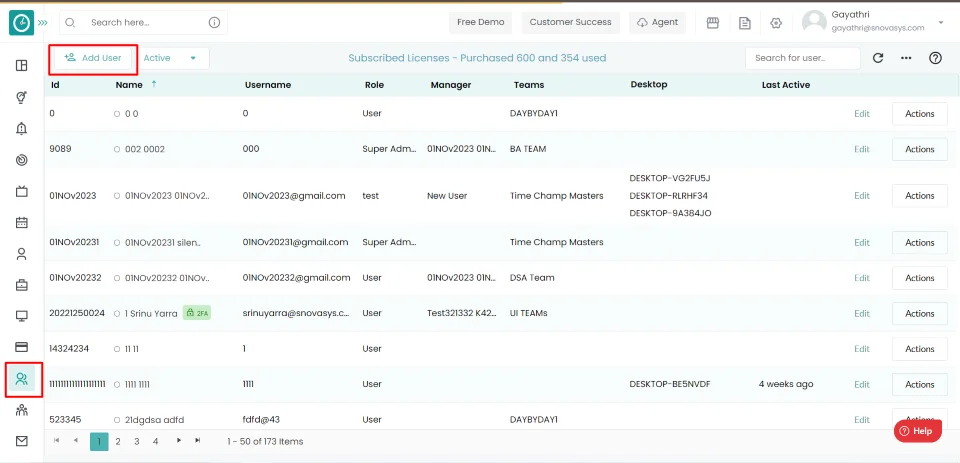
Users
You can view the Users list in the Users tab.
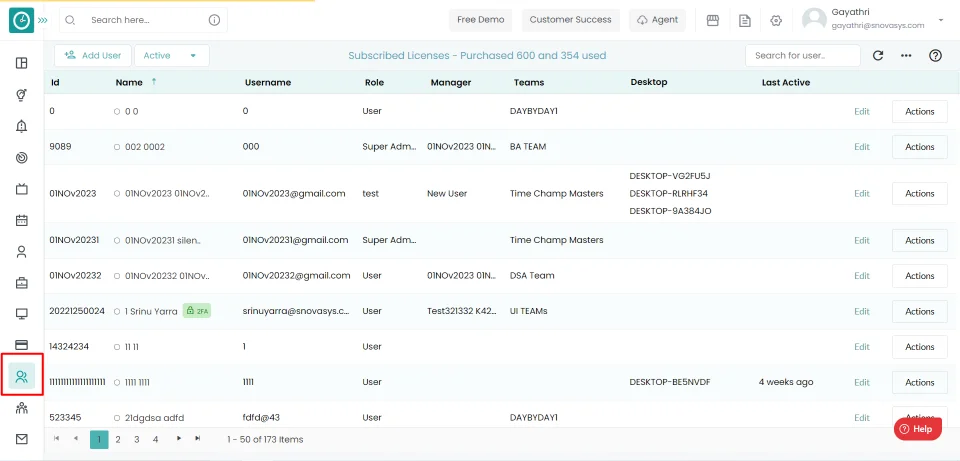
Now you are viewing the list of users in the dashboard.
You can add as many users to your organization as the licenses available in your plan.
Navigation: Go to Users => Users Tab
If the user has Super Admin Permission,
then
he can be able to add users.
This permission can be configured by following the steps: -
Add Users to Organization
, then select the roles you want to grant permissions to configure and check them.Add Users to Organization
, for the defined roles.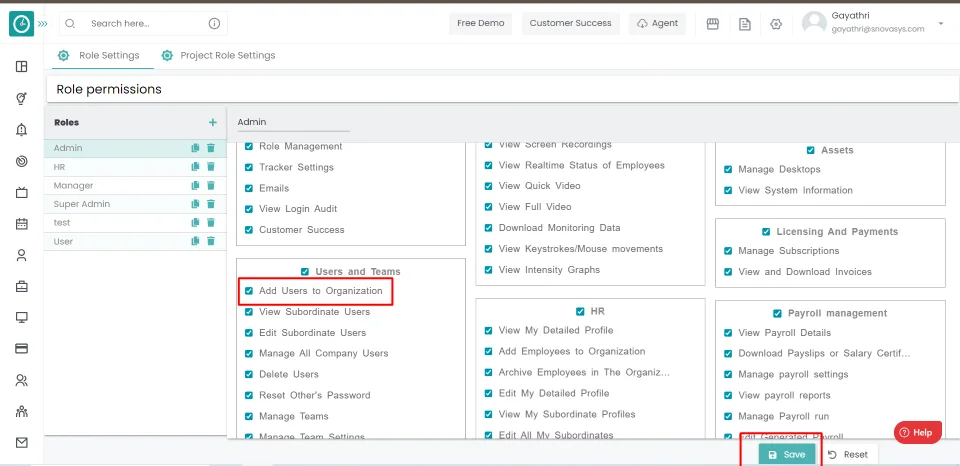
Add Users
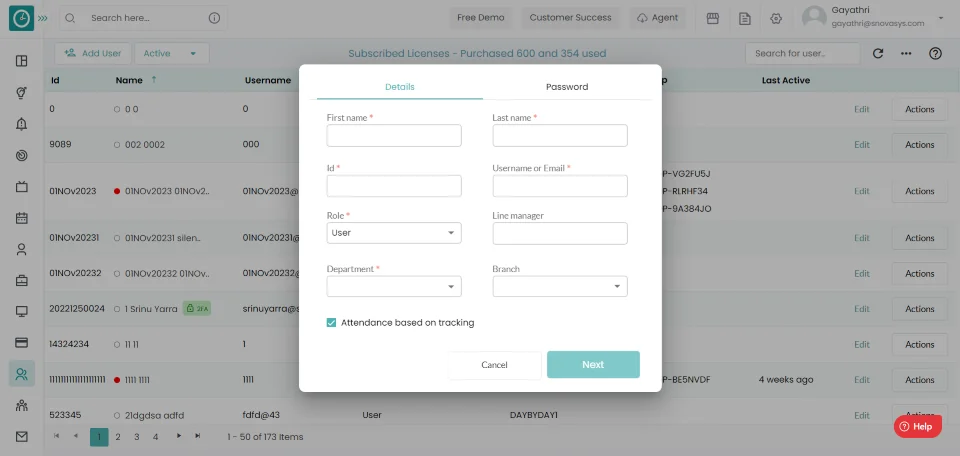
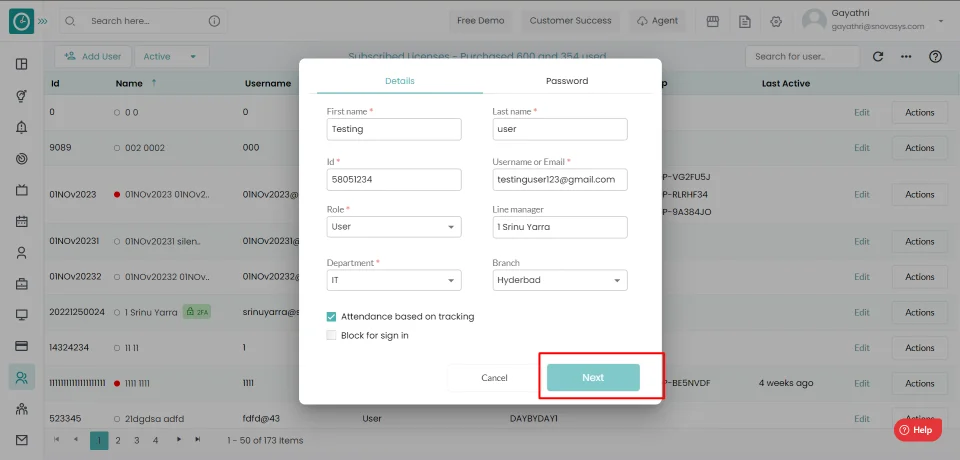
Now you have successfully added the user to the organization.
You can add as many users to your organization as the licenses available in your plan.
Navigation: Go to Users => Users Tab
If the user has Super Admin Permission,
then
he can be able to add users.
This permission can be configured by following the steps: -
Add Users to Organization
, then select the roles you want to grant permissions to configure and check them.Add Users to Organization
, for the defined roles.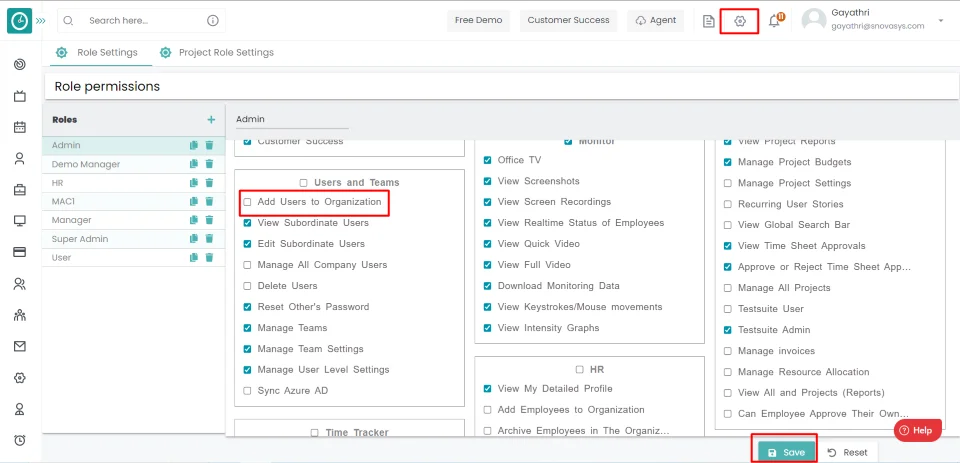
Add Users
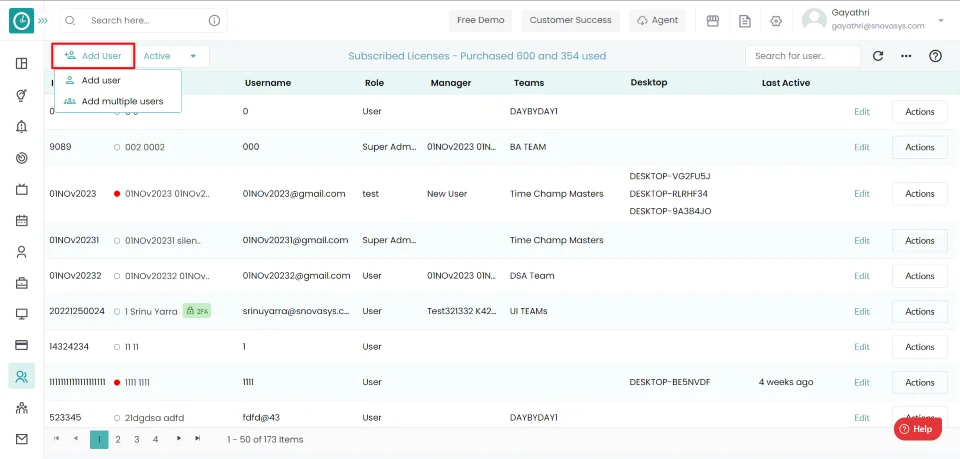
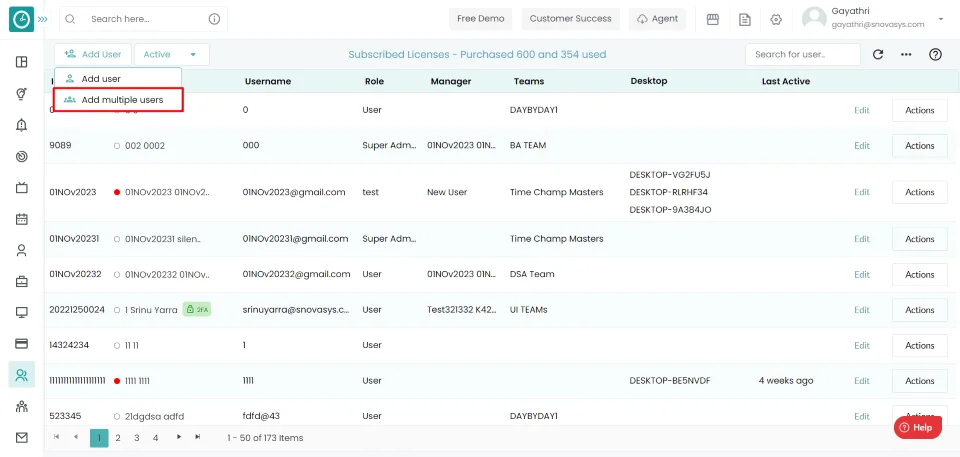
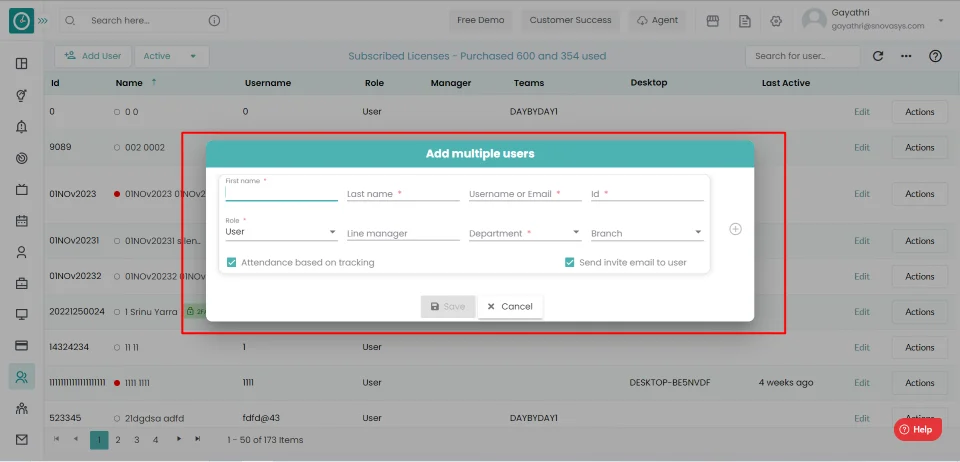
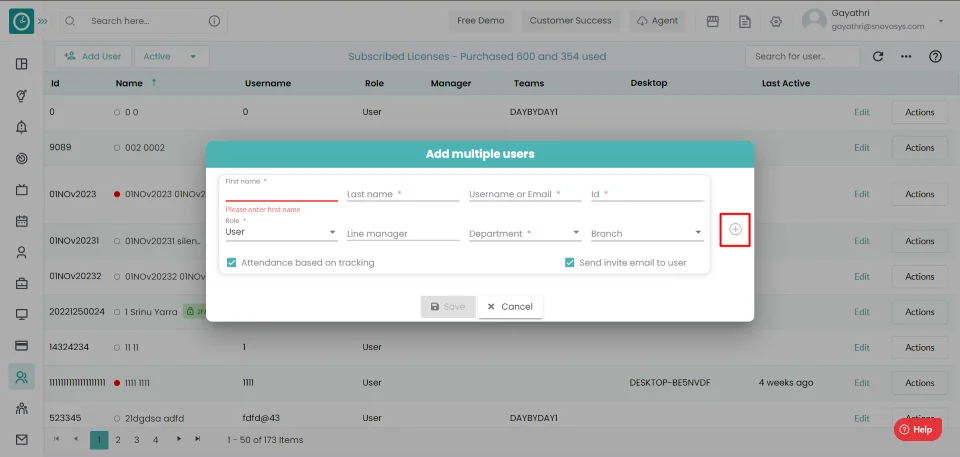
Now you have successfully added multiple users to the organization.
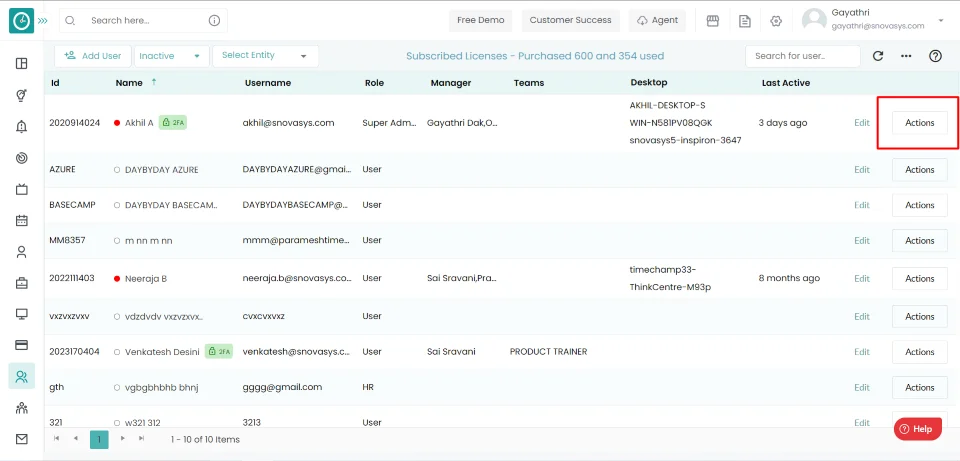
Time Champ allows you to download all the users in the organization.
Navigation: Go to Users => Users Tab
If the user has Super Admin Permission,
then
he can be able to download all the users.
This permission can be configured by following the steps: -
Any permission from users and teams ,
then select the roles you want to grant permissions to configure and check them.Download Users
to Organization, for the defined roles.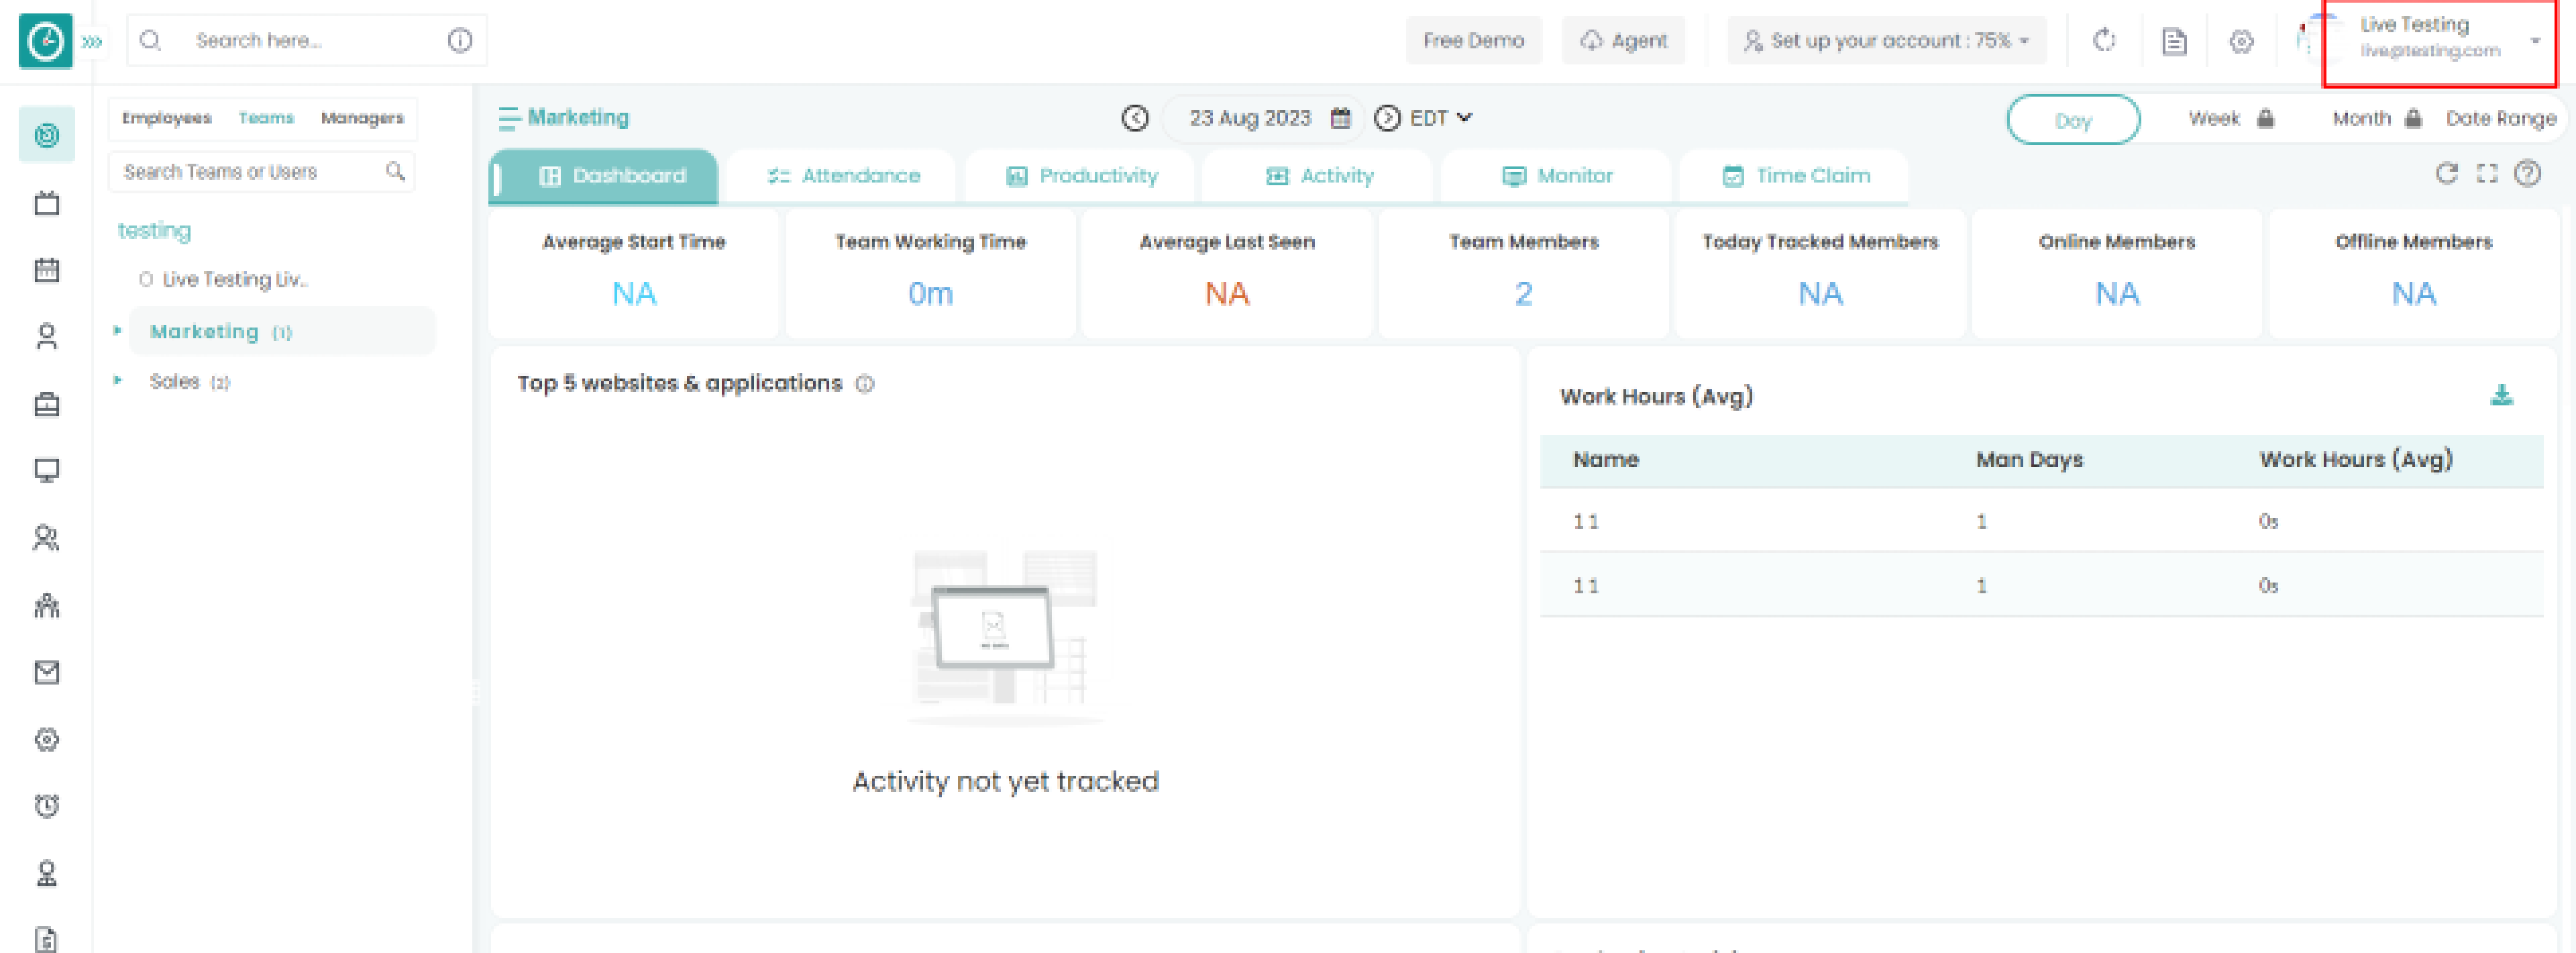
Download Users
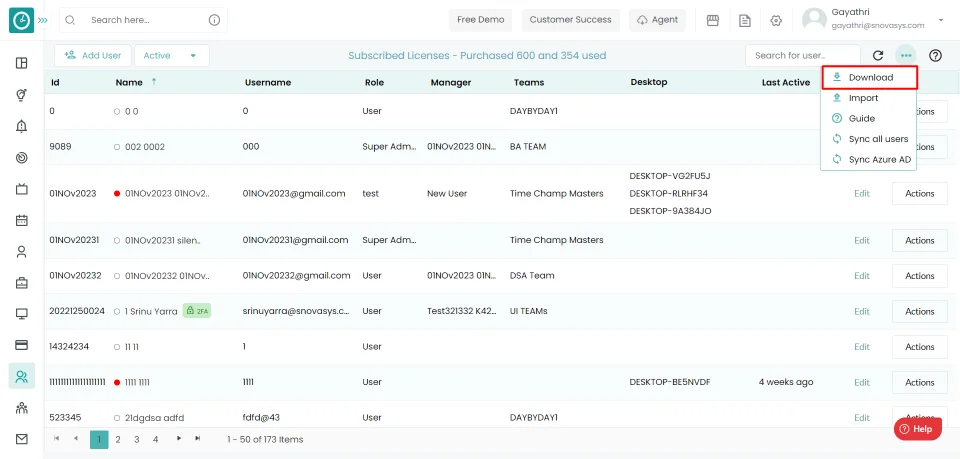
Now you have successfully downloaded the user from the organization.
Time Champ allows you to Upload the multiple users to an organization.
Navigation: Go to Users => Users Tab
If the user has Super Admin Permission,
then
he can be able to download all the users.
This permission can be configured by following the steps: -
Any permission from users and teams ,
Then select the roles you want to grant permissions to configure and check them.Upload Users
to Organization, for the defined roles.Upload Users
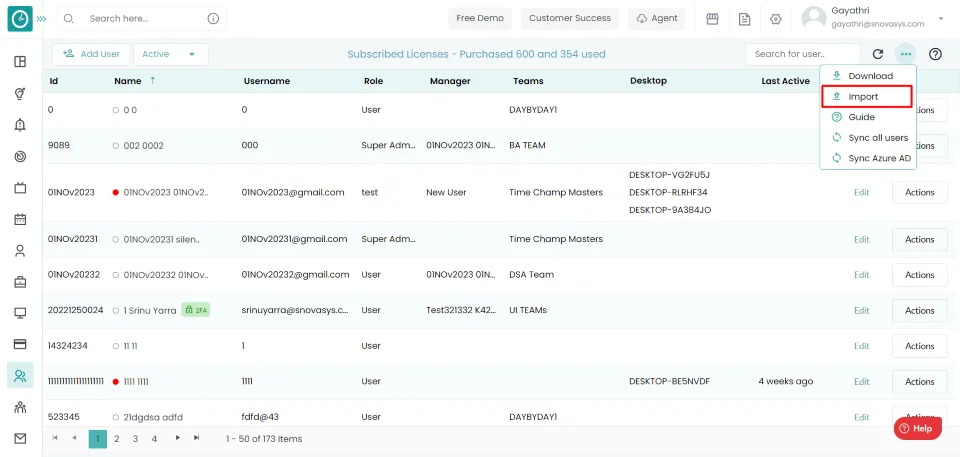
Now you have successfully uploaded the user to the organization.
You can add as many users to your organization as the licenses available in your plan.
Navigation: Go to Users => Users Tab
If the user has Super Admin Permission,
then
he can be able to add users.
This permission can be configured by following the steps: -
Edit Subordinate Users/Manage All Company Users
to Organization , then select the roles you want to grant permissions to configure and check them.Edit Subordinate Users/Manage All Company Users
to Organization , for the defined roles.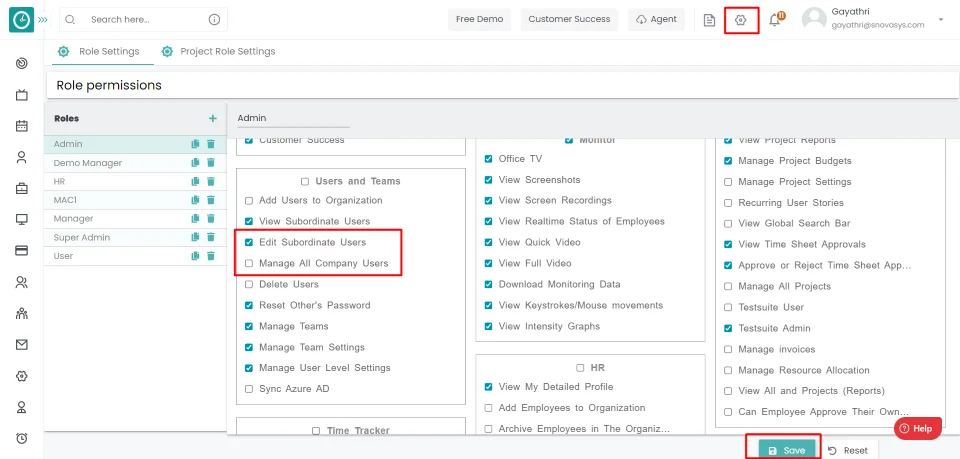
Edit Users
Now you have successfully changed the user details in the organization.
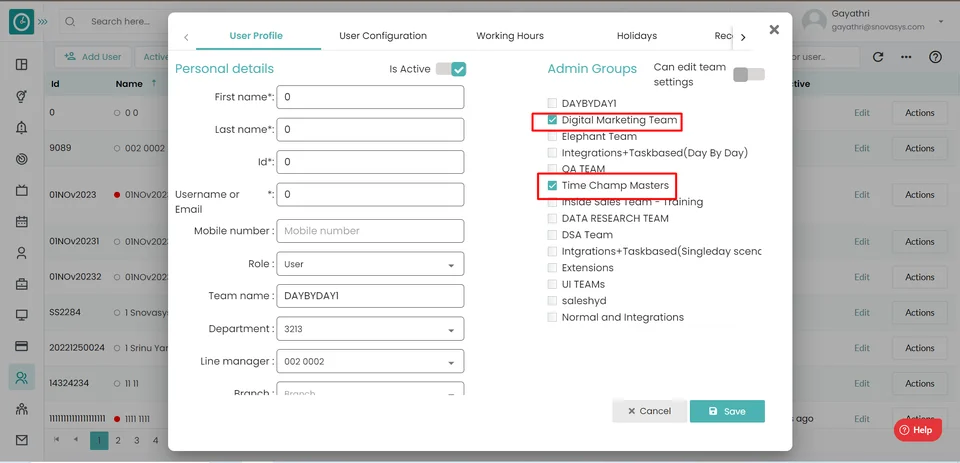
You can assign/edit a team to an employee in the hierarchy.
Navigation: Go to Users => Users Tab
If the user has Super Admin Permission,
then
he can be able to assign/edit a team to the user.
This permission can be configured by following the steps: -
Edit Subordinate Users / Manage All Company Users ,
then select the roles you want to grant permissions to configure and check them.Edit Subordinate Users Manage All Company Users ,
for the defined roles.
Assign Team
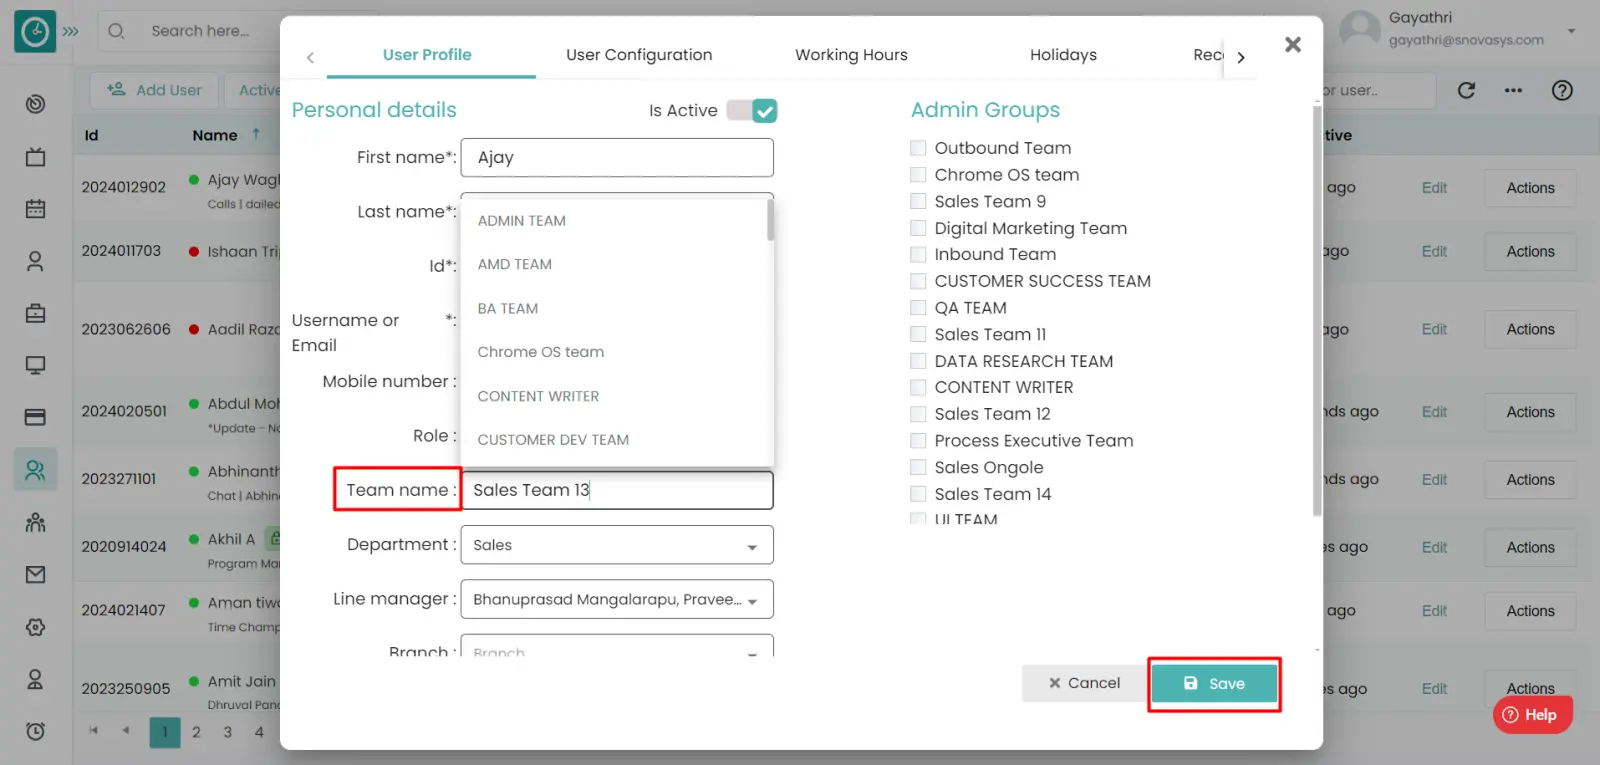
Now you have Successfully assigned/edit the team to an employee.
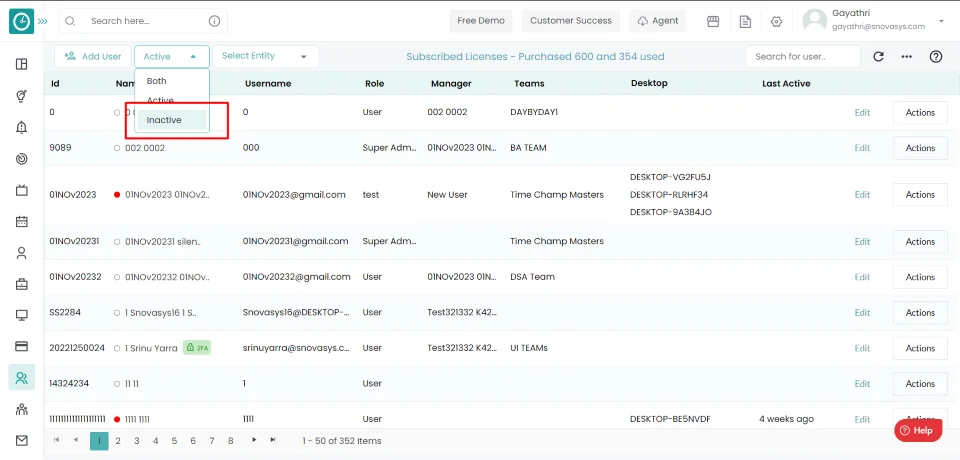
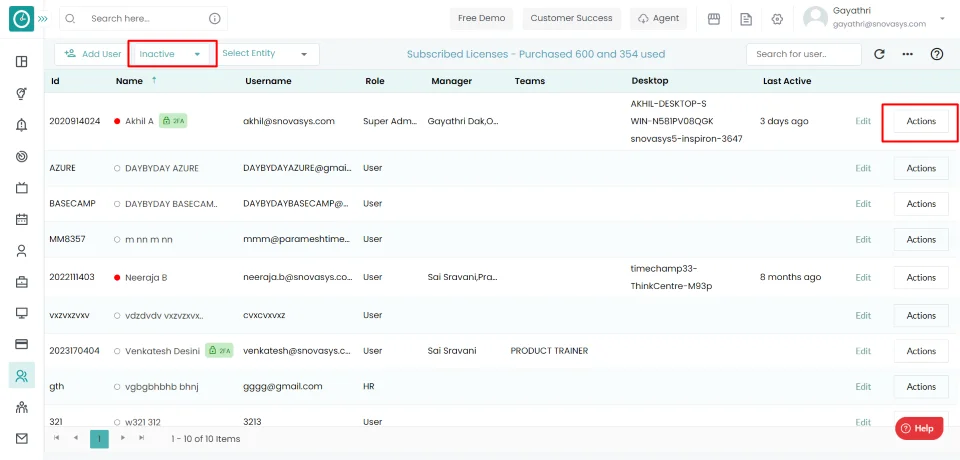
Time Champ allows you to inactive users that you have created but are no longer using…
Navigation: Go to Users => Users Tab
If the user has Super Admin Permission,
then
he can be able to inactive a user.
This permission can be configured by following the steps: -
Edit Subordinate Users / Manage All Company Users ,
then select the roles you want to grant permissions to configure and check them.Edit Subordinate Users Manage All Company Users ,
for the defined roles.
Inactive User
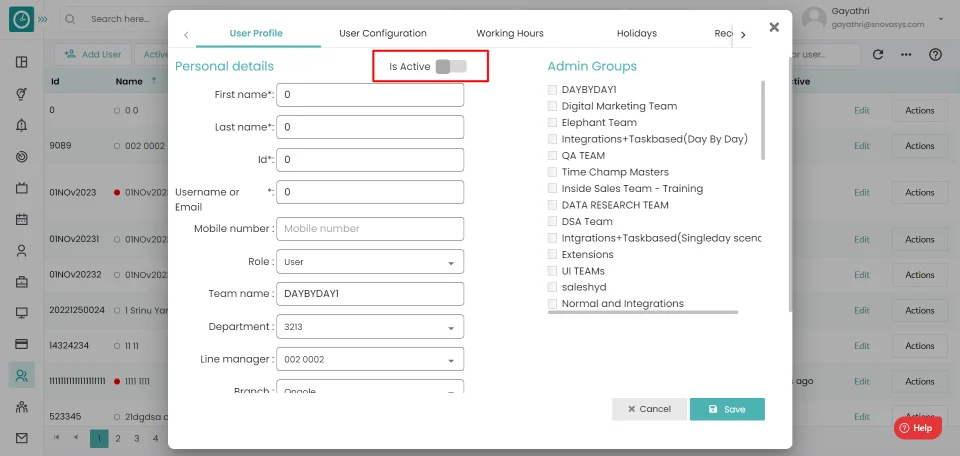
Successfully you have inactivated a user.
Allow the user to manage the team data, so the user can view/edit team data.
Navigation: Go to Users => Edit => User Profile
If the user has Super Admin Permission,
then
he can be able to manage the team.
This permission can be configured by following the steps: -
Manage Teams ,
then select the roles you want to grant permissions to configure and check them.Manage Teams ,
for the defined roles.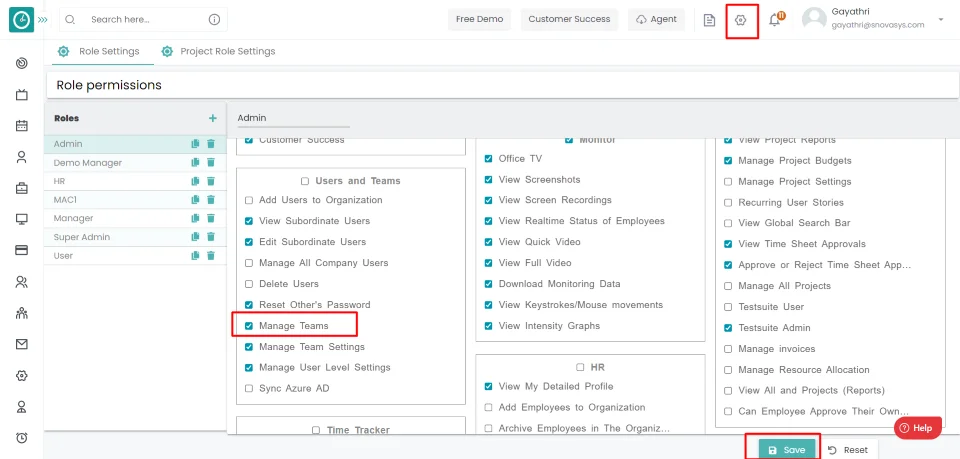
Allow manage team data
Now you have allowed your team members to manage the team data.
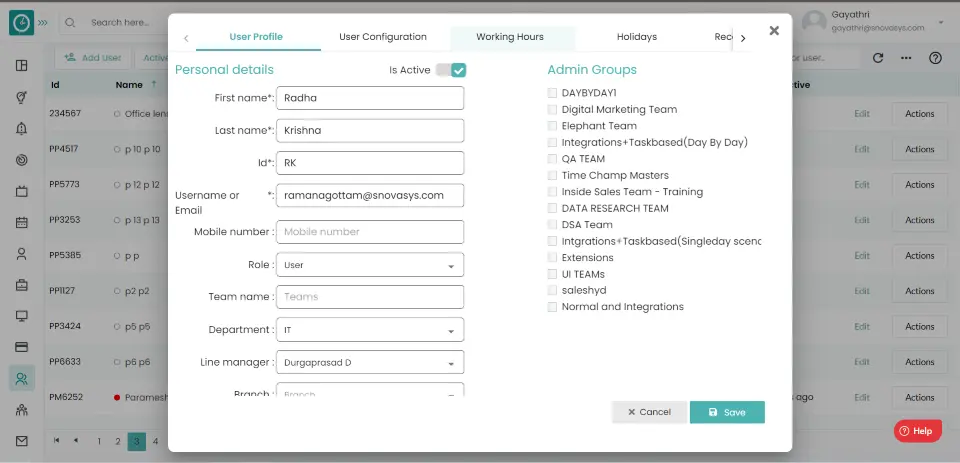
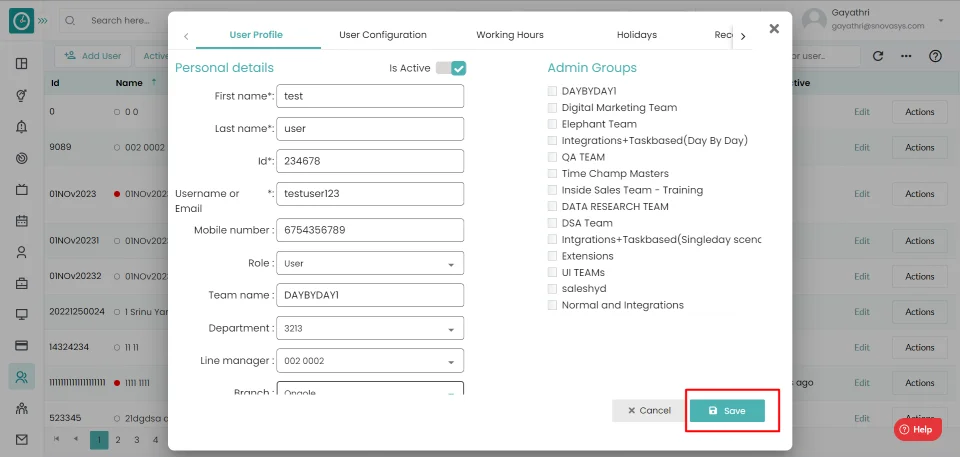
You can assign/edit a role to an employee in the hierarchy.
Navigation: Go to Users => Users Tab
If the user has Super Admin Permission,
then
he can be able to assign/edit a role to the user.
This permission can be configured by following the steps: -
Edit Subordinate Users / Manage All Company Users ,
then select the roles you want to grant permissions to configure and check them.Edit Subordinate Users Manage All Company Users ,
for the defined roles.Assign Role

Now you have assigned/edited the role for the user.
You can assign a line manager to an employee in the hierarchy.
Navigation: Go to Users => Users Tab
If the user has Super Admin Permission,
then
he can be able to assign a line manager to the user.
This permission can be configured by following the steps: -
Edit Subordinate Users / Manage All Company Users ,
then select the roles you want to grant permissions to configure and check them.Edit Subordinate Users Manage All Company Users ,
for the defined roles.Assign Line Manager
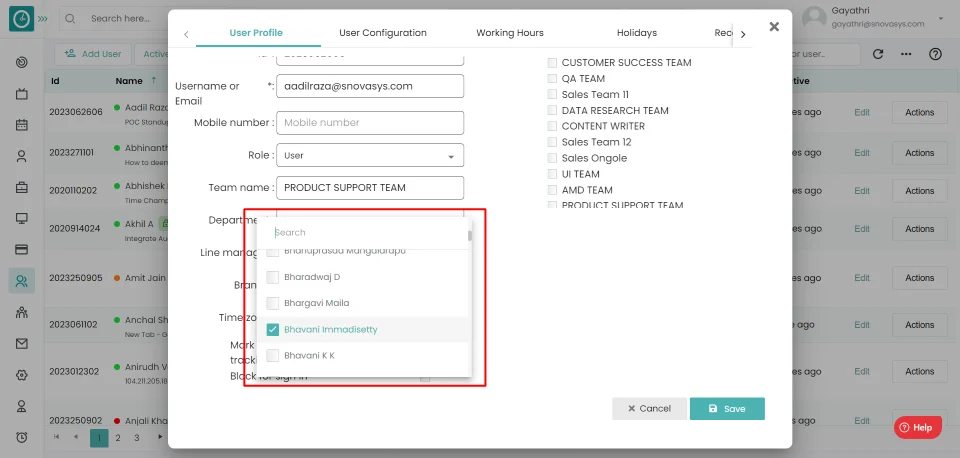
Now you have assigned the line manager to the user.
You can block a user from signing in to Time Champ.
Navigation: Go to Users => Users Tab
If the user has Super Admin Permission,
then
he can be able to block the user for sign-in.
This permission can be configured by following the steps: -
Edit Subordinate Users / Manage All Company Users ,
then select the roles you want to grant permissions to configure and check them.Edit Subordinate Users Manage All Company Users ,
for the defined roles.Block user to sign in...
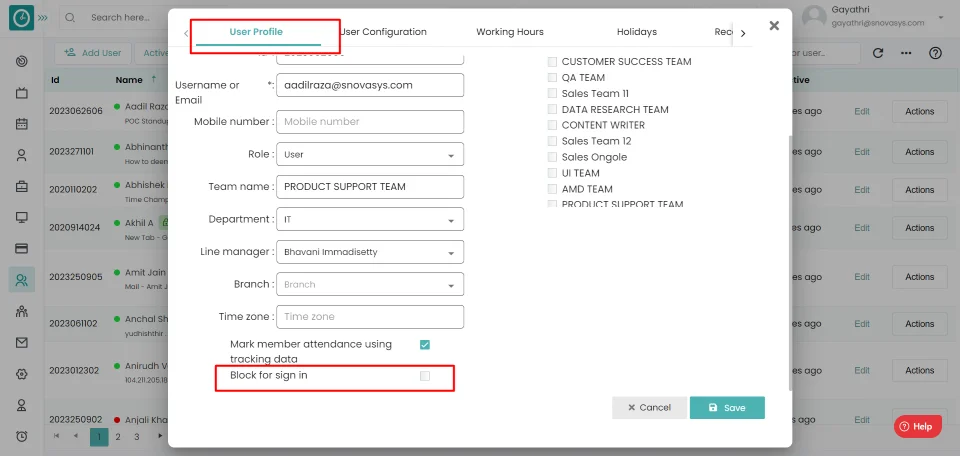
Now you have successfully blocked the user from login.
Users can force logout from Time Champ at any time.
Navigation: Go to Users => Users Tab
If the user has Super Admin Permission,
then
he can be able to force logout user.
This permission can be configured by following the steps: -
View Subordinate Users / Manage All Company Users ,
then select the roles you want to grant permissions to configure and check them.View Subordinate Users Manage All Company Users ,
for the defined roles.
Force Logout
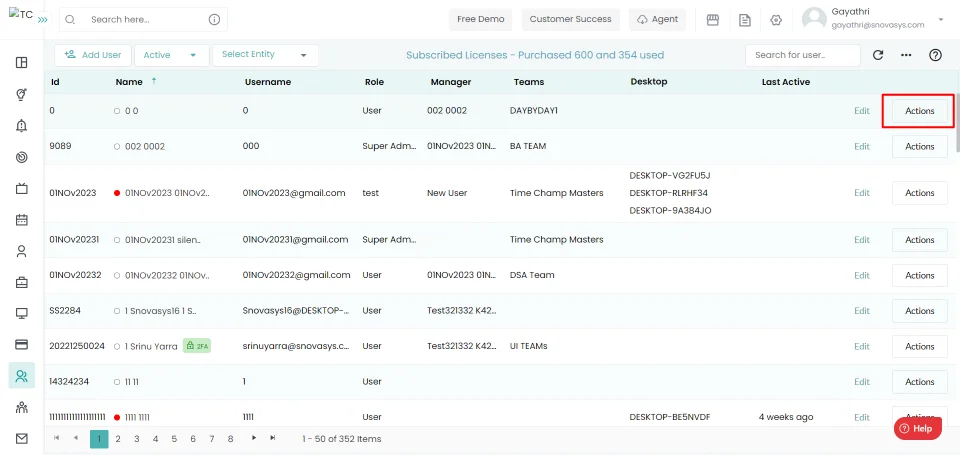
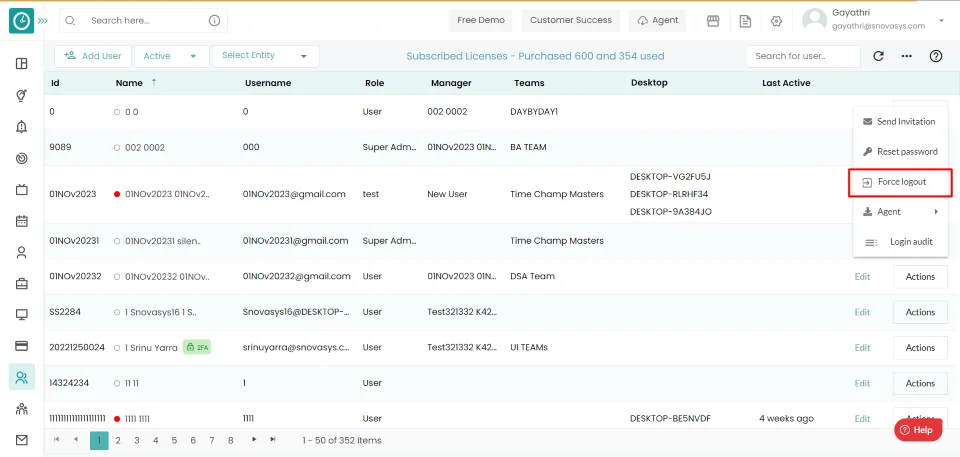
Now you have to log the user forcibly.
You can delete users from Time Champ
Navigation: Go to Users => Users Tab
If the user has Super Admin Permission,
then
he can be able to delete users' data.
This permission can be configured by following the steps: -
Edit Subordinate Users / Manage All Company Users
including Delete Users , then select the roles you want to grant permissions to configure and check them.Edit Subordinate Users Manage All Company Users
including Delete Users , for the defined roles.Delete User Data

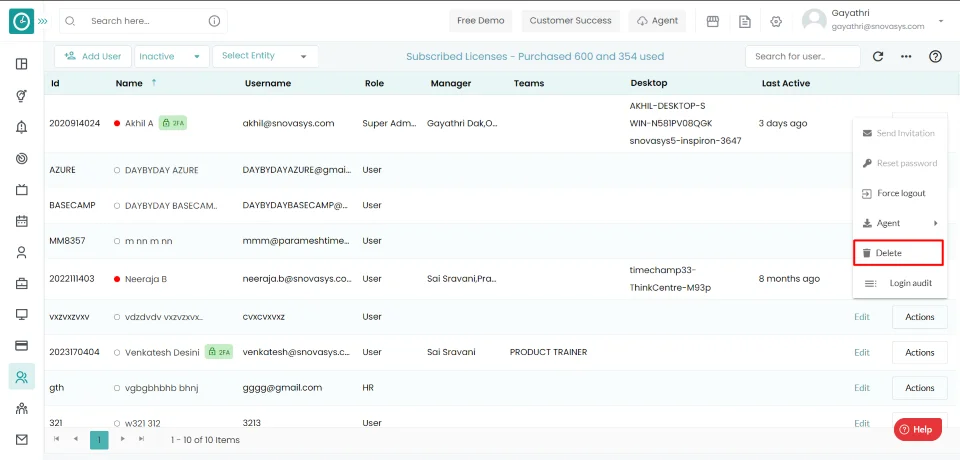
Now you have deleted the user from the organization.
You can reset other users' password to log in to the time champ.
Navigation: Goto Users => Users Tab
If the user has Super Admin Permission,
then
he can be able to reset the user's password.
This permission can be configured by following the steps: -
View Subordinate Users / Manage All Company Users
including Reset Other's Password , then select the roles you want to grant permissions to configure and check them.View Subordinate Users Manage All Company Users
including Reset Other's Password , for the defined roles.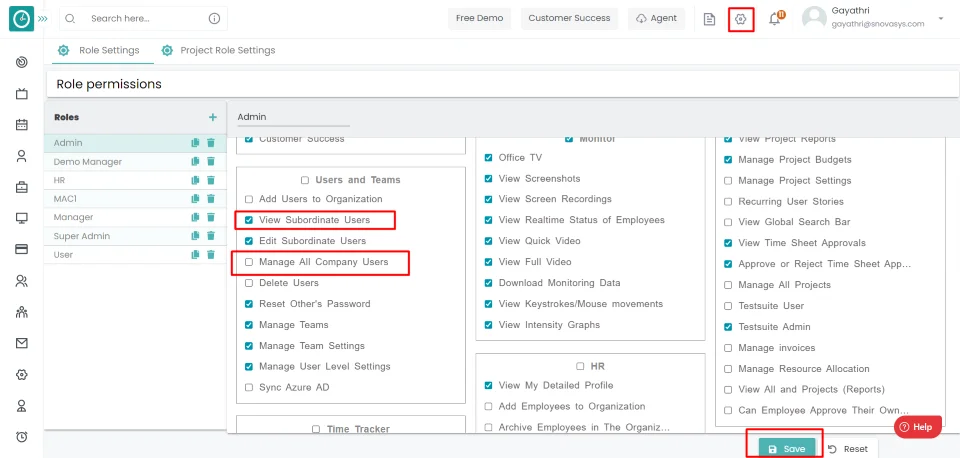
Reset the user's password
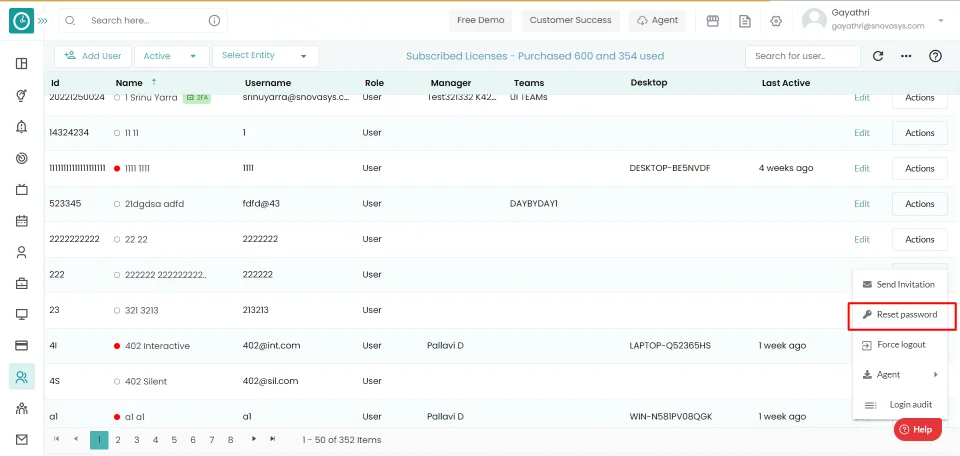
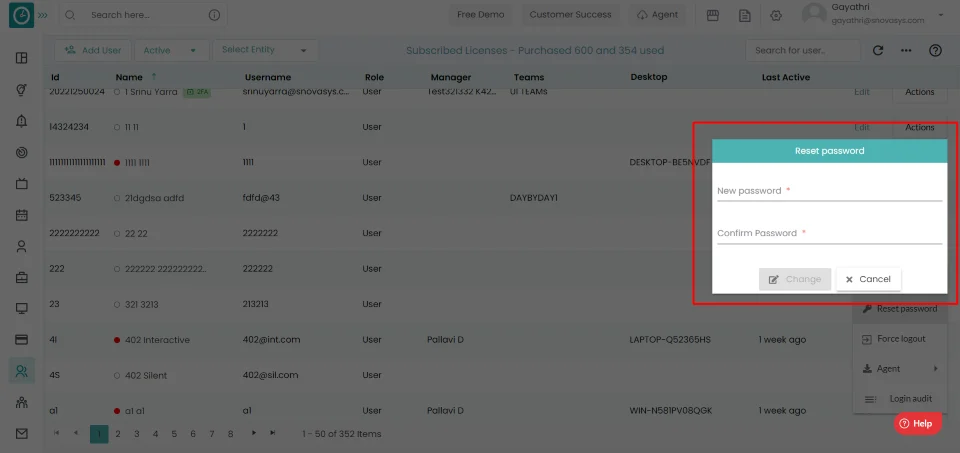
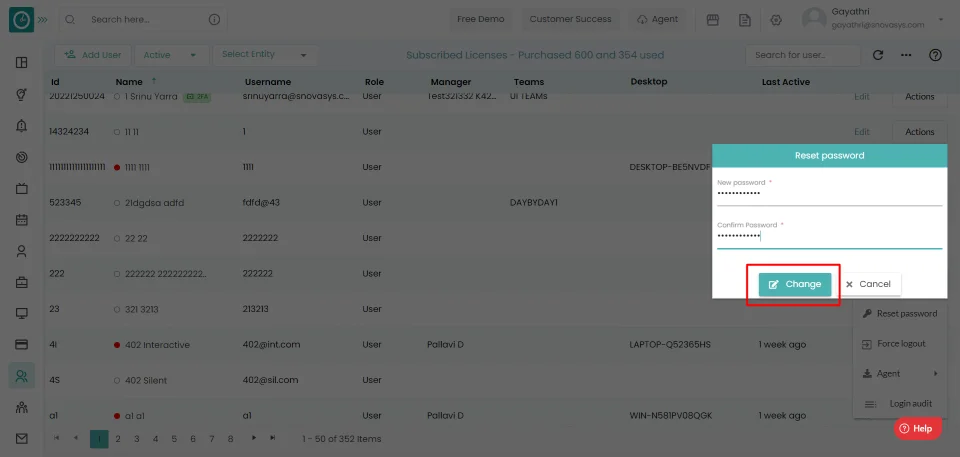
successfully you have changed the password of the user.
You can view user login history data audit – date, time, user email, login status, city name, IP address, browser.
Navigation: Go to Users => Users Tab
If the user has Super Admin Permission,
then
he can be able to reset the user's password.
This permission can be configured by following the steps: -
View Subordinate Users / Manage All Company Users
including View Login Audit , then select the roles you want to grant permissions to configure and check them.View Subordinate Users Manage All Company
Including View Login Audit , for the defined roles.
Login Audit
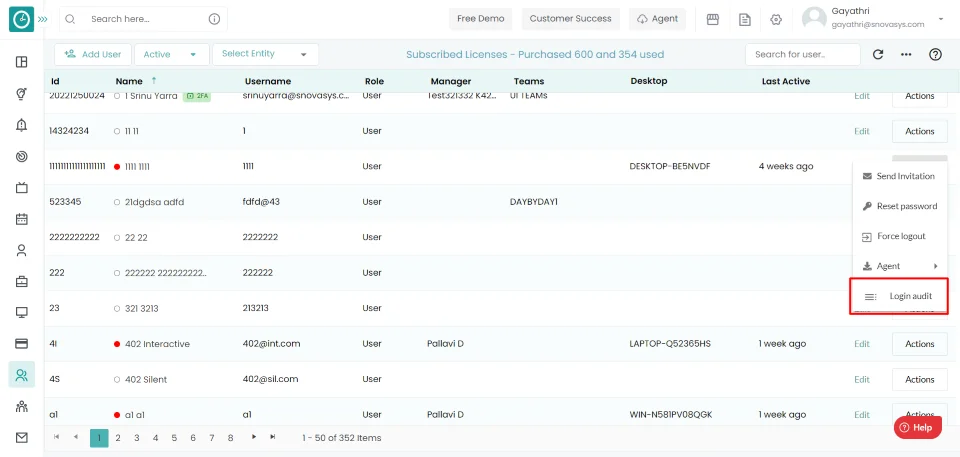

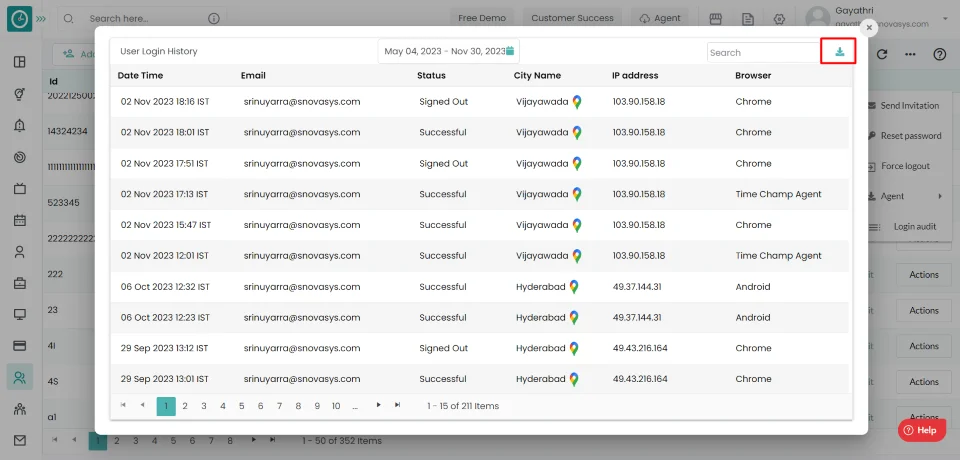
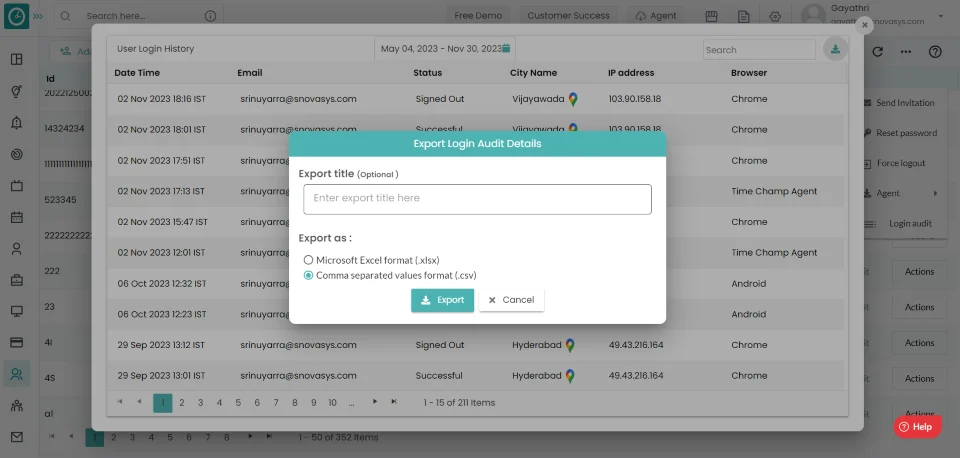
Now you are able to check the user's login audit.
Teams Management
![]() Copied
Copied
Time Champ Teams enables you to manage all of your company's teams in one place. You can add the team to the company. You can add the data for every team in Time Champ. You can add users to the team and delete users from the team. Time Champ allows you to configure the settings for the team separately. You can add the holidays to a particular team. You can set the shift timings and working days for each team separately.
You can view the Teams list in organization.
Navigation: Go to Users => Teams Tab
If the user has Super Admin Permission,
then
he can be able to view teams.
This permission can be configured by following the steps: -
Manage Teams ,
then select the roles you want to grant permissions to configure and check them.Manage Teams ,
for the defined roles.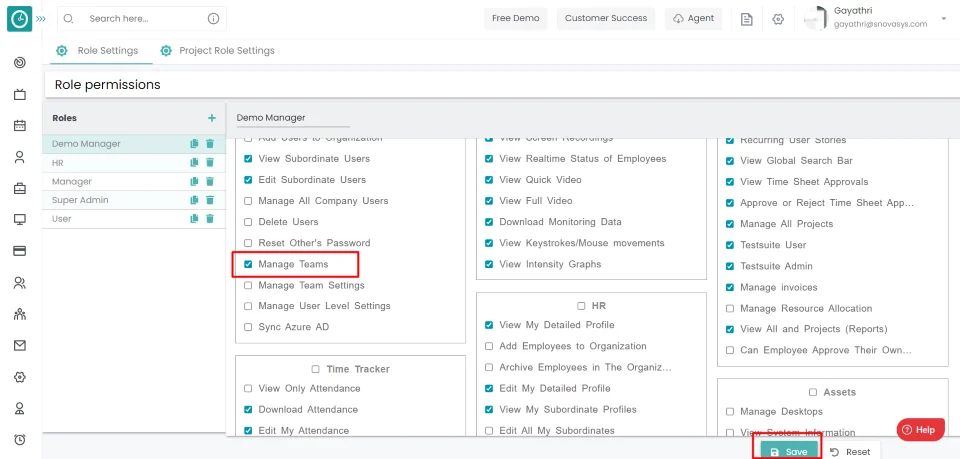
Teams
You can view the Teams list in the Teams tab.
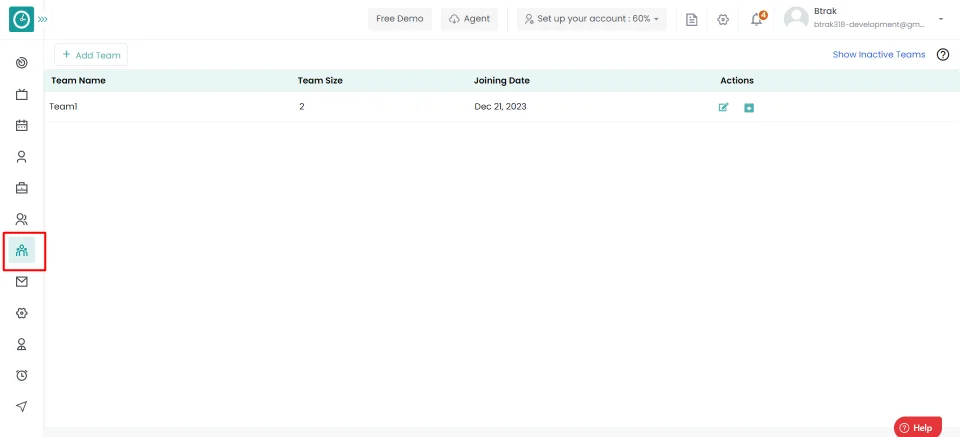
Now you are viewing the list of teams available in an organization.
You can view Team size in the organization.
Navigation: Go to Users => Teams Tab
If the user has Super Admin Permission,
then
he can be able to view team size.
This permission can be configured by following the steps: -
Manage Teams ,
then select the roles you want to grant permissions to configure and check them.Manage Teams ,
for the defined roles.
Teams size
You can view Team size in the Teams tab.
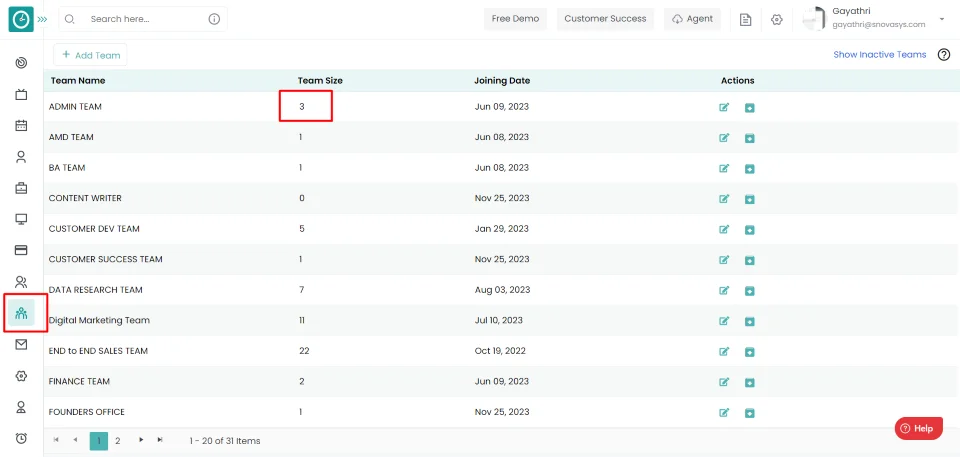
Now you are viewing the list of teams available in an organization.
You can create a new team new an organization.
Navigation: Go to Users => Teams Tab
If the user has Super Admin Permission,
then
he can be able to create a new team.
This permission can be configured by following the steps: -
Manage Teams ,
then select the roles you want to grant permissions to configure and check them.Manage Teams ,
for the defined roles.
Add new team
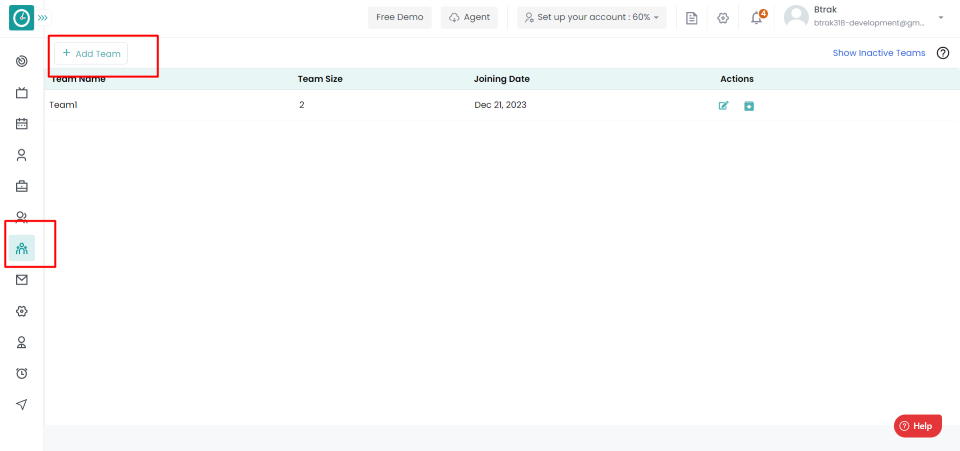
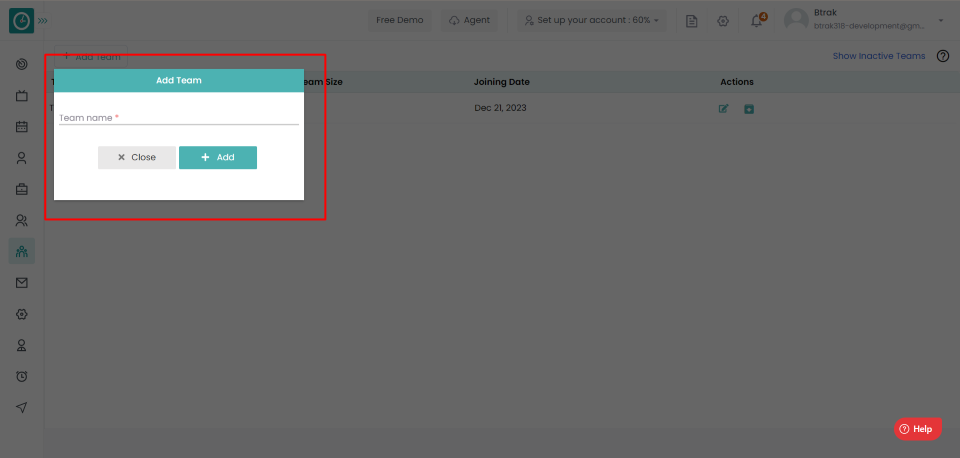
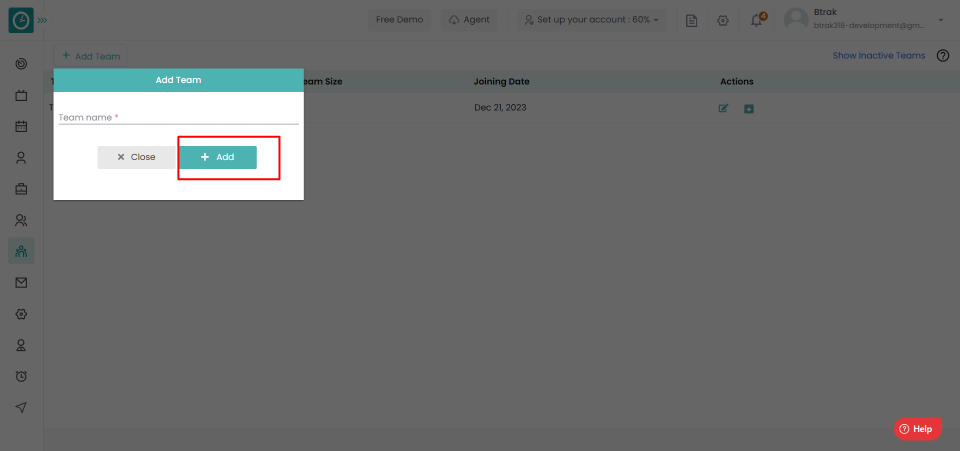
Now you successfully created a new team.
You can edit a team in an organization.
Navigation: Go to Users => Teams Tab
If the user has Super Admin Permission,
then
he can be able to create a new team.
This permission can be configured by following the steps: -
Manage Teams ,
then select the roles you want to grant permissions to configure and check them.Manage Teams ,
for the defined roles.
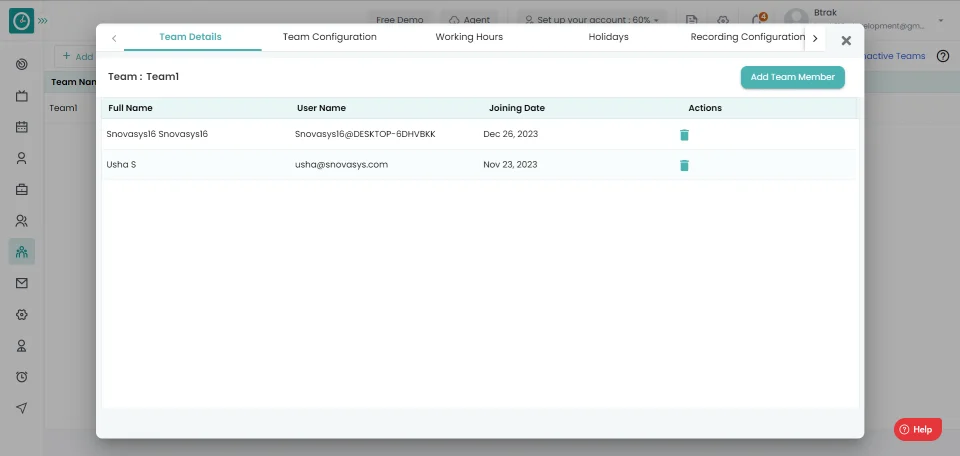
Edit a team
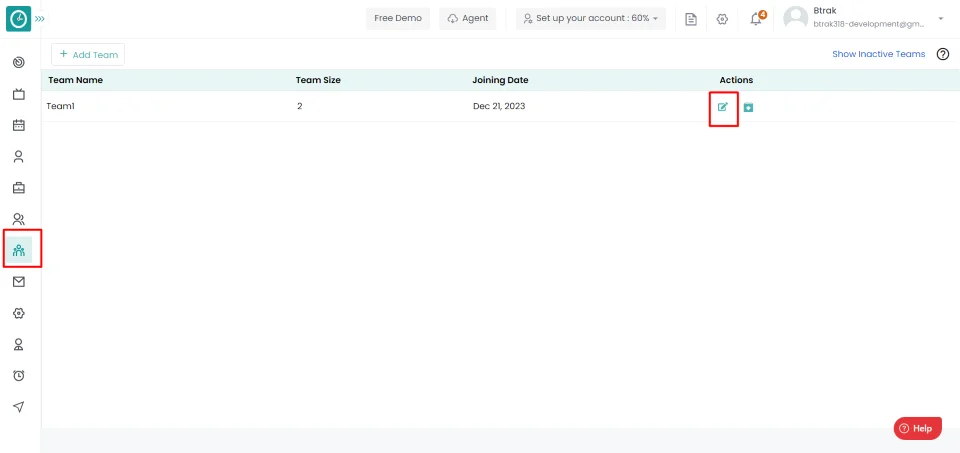
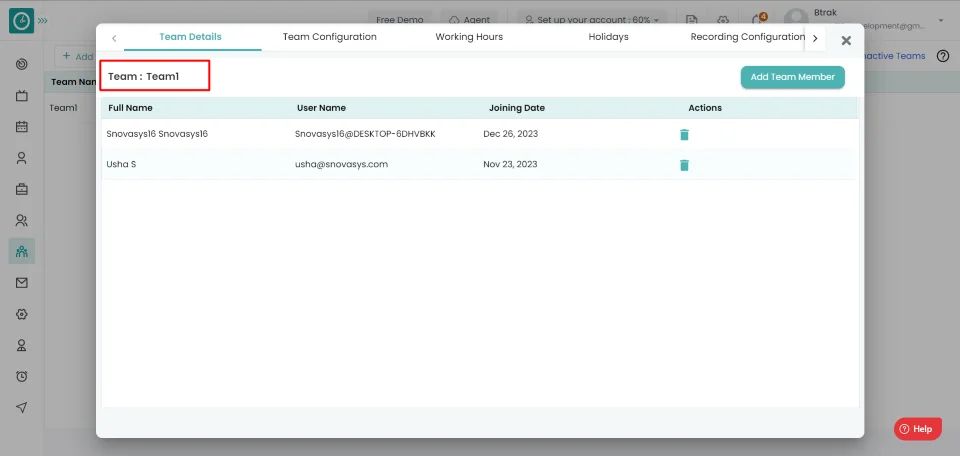
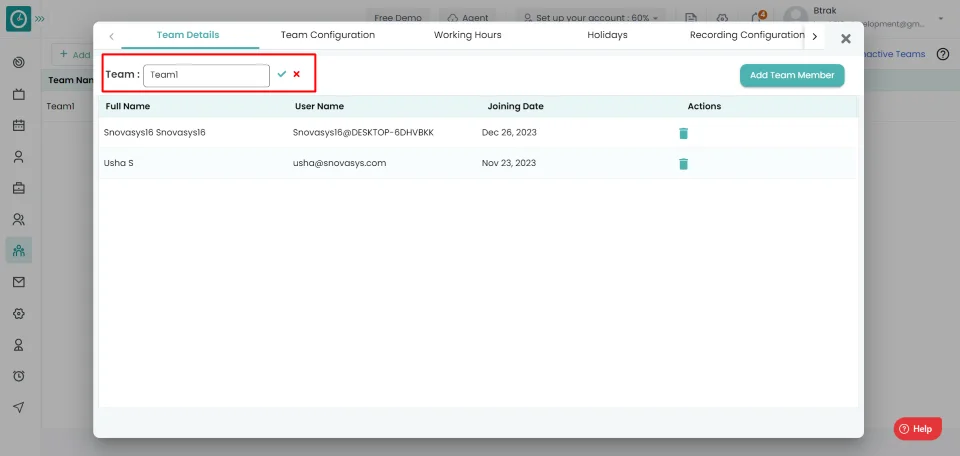
Now you successfully edited a team name.
You can create a new team new an organization.
Navigation: Go to Users => Teams Tab
If the user has Super Admin Permission,
then
he can be able to create a new team.
This permission can be configured by following the steps: -
Manage Teams ,
then select the roles you want to grant permissions to configure and check them.Manage Teams ,
for the defined roles.
Add a member to the team
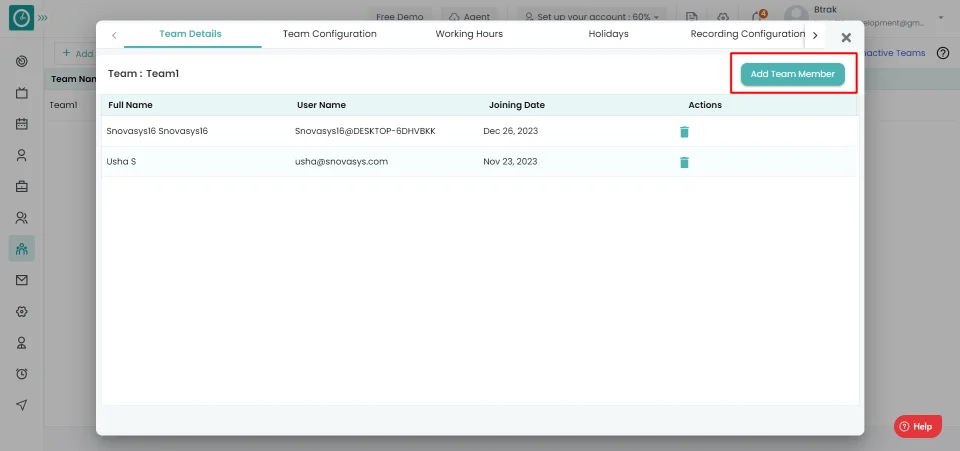
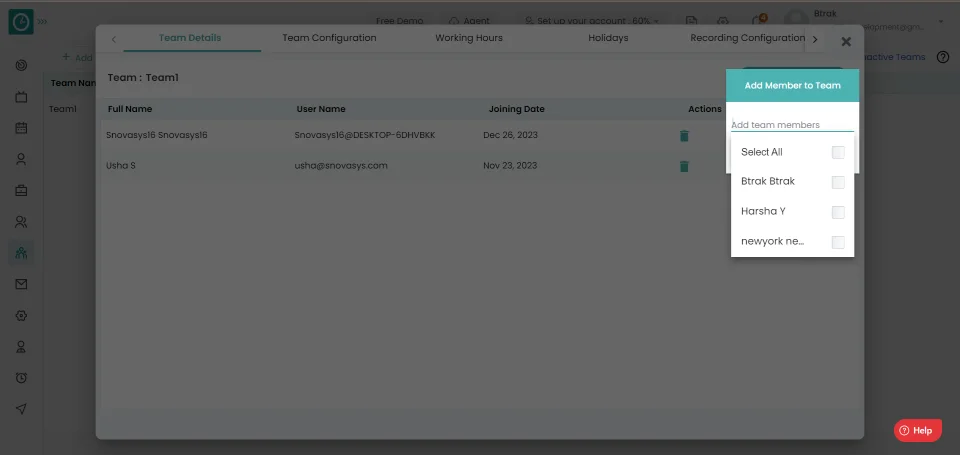
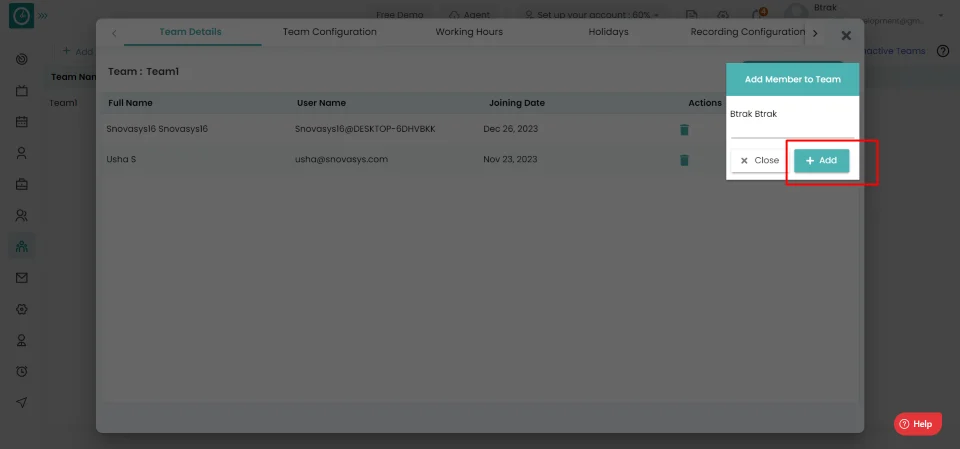
Now you have successfully added a member to a team.
You can delete a user from a team...
Navigation: Go to Users => Teams Tab
If the user has Super Admin Permission,
then
he can be able to create a new team.
This permission can be configured by following the steps: -
Manage Teams ,
then select the roles you want to grant permissions to configure and check them.Manage Teams ,
for the defined roles.
Delete Team member
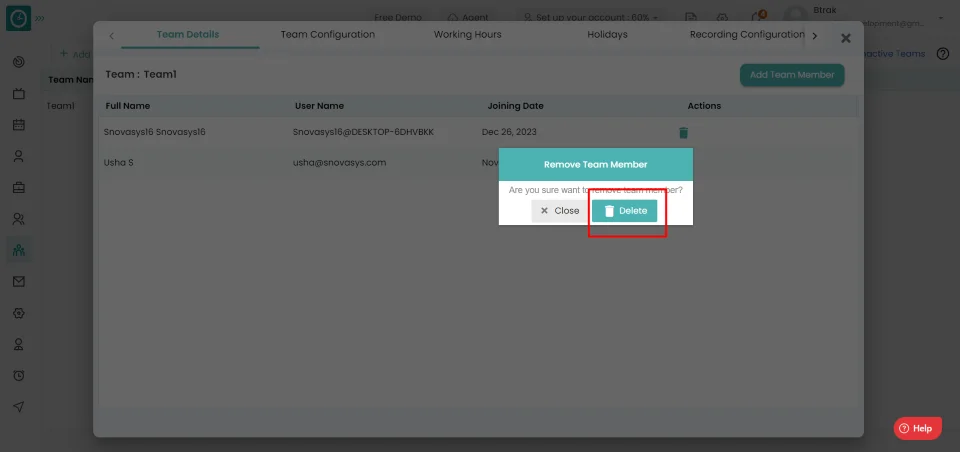
Now you have Successfully removed a user from the team.
You can Archive a team from an organization...
Navigation: Go to Users => Teams Tab
If the user is having Super Admin
Permission, then he can be able to archive the team.
This permission can be configured by following the steps: -
Manage Teams ,
then select the roles you want to grant permissions to configure and check them.Manage Teams ,
for the defined roles.
Archive Team
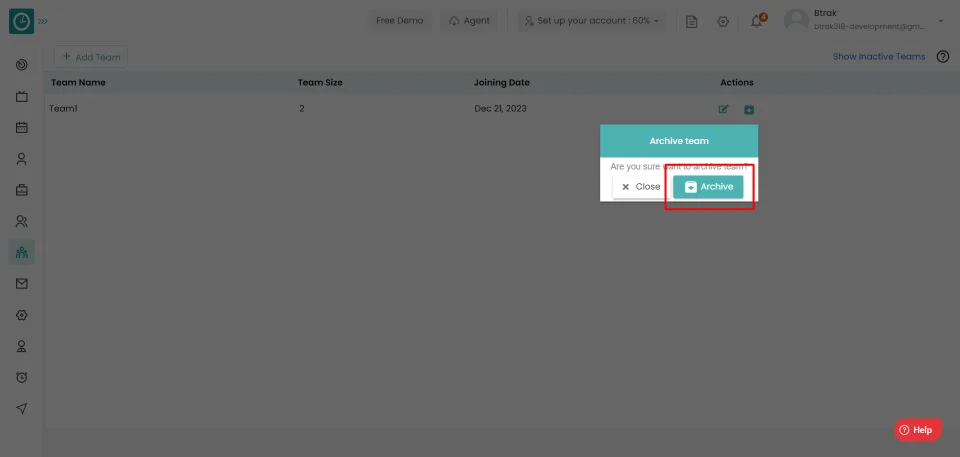
Now you have successfully archived a team.